Today in Blakeyrat is always several years behind in every tech trend news...
-
-
@hungrier said in Today in Blakeyrat is always several years behind in every tech trend news...:
sawdust
as structurally sound as carved wood
Y'ever take a hammer to carved wood?
ed. wood is a lignin-cellulose composite material, at heart (good tree joke), and therefore it actually seems likely that an appropriate process can get some mileage out of it. I have concern over fiber length still
-
 : Flammable 3D printing material... great idea!
-
@Gribnit said in Today in Blakeyrat is always several years behind in every tech trend news...:
ed. wood is a lignin-cellulose composite material
Actually, he was a filmmaker
-
@hungrier said in Today in Blakeyrat is always several years behind in every tech trend news...:
Actually, he was a filmmaker
Citation needed, I've seen his work.
-
@Gribnit If he wasn't a filmmaker, how could you see his works? Checkmate criticists
-
@hungrier said in Today in Blakeyrat is always several years behind in every tech trend news...:
If he wasn't a filmmaker, how could you see his works?
Eppur si muove
-
@Zerosquare said in Today in Blakeyrat is always several years behind in every tech trend news...:
: Flammable 3D printing material... great idea!It's plastic, so lot's of Cs and stuff. Tends to be flammable.
Although this does remind me .. saw this recently:
. https://www.3djake.com/polymaker/polycast-natural
Made for casting ("Burns without residue."). Haven't tried it, so can't tell if that actually works. Also, fuck knows what it actually is.
-
@Gribnit said in Today in Blakeyrat is always several years behind in every tech trend news...:
@Polygeekery you just made up this word tram right now, admit it.
I admit nothing. Also:
 3 Effective Methods for Tramming a Milling Machine - Practical Machinist

There are several different methods that can help you get your machine in tram. Let’s take a look at the most common and identify the most reliable ones.
Leveling is a good enough word for those who have never spent time in a machine shop. For those who have, like myself, it is a pedantic annoyance like you would not believe.
-
@TimeBandit said in Today in Blakeyrat is always several years behind in every tech trend news...:
 A New Printer Uses Sawdust to Print Wooden Objects

A new printer called Forust is using scrap wood to 3D print wooden objects that are as structurally sound as regular carved wood.
Wood filament has been a thing for a while. If you want to wear out a nozzle almost as quickly as using carbon fiber blend PETG, it is actually pretty easy to print with.
-
@Gribnit said in Today in Blakeyrat is always several years behind in every tech trend news...:
Y'ever take a hammer to carved wood?
I doubt it would be significantly different than a 3D print by a n00b. Layer adhesion is an issue and is substantially similar to woodgrain. Once you get past the basics, and especially when printing functional prints, you have to pay great attention to layer line orientation. Also, everything is a compromise. Rarely will you get a print that has an orientation that is optimal for all considerations. Usually you have to make a compromise between amount of support material needed and which direction is optimal for strength.
This is a lesson that I have learned (many times, and once very recently so it is close to mind) with sometimes comedic effects.
-
@Zerosquare said in Today in Blakeyrat is always several years behind in every tech trend news...:
: Flammable 3D printing material... great idea!They're all some degree of flammable. Strangely, I have never tried burning a wood filament. I may have to give that a go. If it wouldn't most likely foul the food I might try making the world's most expensive charcoal starters.
-
@Polygeekery said in Today in Blakeyrat is always several years behind in every tech trend news...:
carbon fiber blend PETG
So they're getting into composites. Anything on the horizon for oriented long fibers? Stressed oriented long fibers?
-
@Polygeekery said in Today in Blakeyrat is always several years behind in every tech trend news...:
world's most expensive charcoal starters.
I suggest using bristlecone pine as the visual model. Take that, nature!
-
@Gribnit said in Today in Blakeyrat is always several years behind in every tech trend news...:
Anything on the horizon for oriented long fibers? Stressed oriented long fibers?
Long fibers seems to be insignificant overall. Plus, it would be a real bastard to print.
When a 3D printer moves from one cohesive print area to another it does a retraction of the filament to reduce nozzle pressure and then moves to the next cohesive print area (potentially with a 'Z-hop' where the Z axis is moved to allow clearance from previous layers). If you have long fibers those would cause stringing like you could never imagine.
But initial tests with SLA processes (where it is easier to introduce long fibers) do not show a significant increase in tensile strength. Or, not enough to justify their addition.
-
@cvi said in Today in Blakeyrat is always several years behind in every tech trend news...:
@Zerosquare said in Today in Blakeyrat is always several years behind in every tech trend news...:
: Flammable 3D printing material... great idea!It's plastic, so lot's of Cs and stuff. Tends to be flammable.
Although this does remind me .. saw this recently:
. https://www.3djake.com/polymaker/polycast-natural
Made for casting ("Burns without residue."). Haven't tried it, so can't tell if that actually works. Also, fuck knows what it actually is.
I have to wonder what benefit this would provide over HIPS. HIPS easily dissolves with limonene. After the dissolving you could rinse your mold with a bit of soapy water and bake it at 200C to drive off residual water and be good to go.
-
@Polygeekery said in Today in Blakeyrat is always several years behind in every tech trend news...:
a pedantic annoyance
 You called?
-
@HardwareGeek said in Today in Blakeyrat is always several years behind in every tech trend news...:
@Polygeekery said in Today in Blakeyrat is always several years behind in every tech trend news...:
a pedantic annoyance
You called?This might require @Benjamin-Hall's services, but have at.
-
@Polygeekery said in Today in Blakeyrat is always several years behind in every tech trend news...:
I have to wonder what benefit this would provide over HIPS. HIPS easily dissolves with limonene.
I would have guessed at having molds made out of something like packed sand, which seem like they would be to rinse without damaging the mold. Not something I've done myself, so this is based on some vague memories from watching somebody talk about historic casting techniques. Not sure if actually a problem.
-
@cvi I have to wonder how much issue the residue actually is? I know a guy that does sand casting with PLA prints by running a very minimum of perimeters and infill and just pours the molten metal in vaporizing the PLA and I don't recall him mentioning any problems.
Sand casting and 3D printing go amazingly well together. You can design your parts with no draft angle because you're not removing the pattern and you can print out your gates and sprues and all of that. Another cool thing is that they used to have to design their patterns to be slightly oversize to account for shrinkage. Now you can design parts to expected size and then just scale up by a few percent when you slice the model and it is taken care of.
-
@Polygeekery Reason for checking it out was actually me being curious about the material. Didn't see any info on the first glance - I guess one could try to track down the MDSs, but
 .
.Don't plan on doing any casting just now, but for me, a key feature would be the smoke/smell (and minimizing it).
-
@cvi said in Today in Blakeyrat is always several years behind in every tech trend news...:
@Polygeekery said in Today in Blakeyrat is always several years behind in every tech trend news...:
I have to wonder what benefit this would provide over HIPS. HIPS easily dissolves with limonene.
I would have guessed at having molds made out of something like packed sand, which seem like they would be to rinse without damaging the mold. Not something I've done myself, so this is based on some vague memories from watching somebody talk about historic casting techniques. Not sure if actually a problem.
I remember sand molds being single-use and disposable. The process I remember is a wax figurine (in my specific case, the details of the figurine are unmentionable) being buried in packed damp sand, then the molten starmetal is poured.
-
So I got my missing extruder connector and affixed it, and have now printed a full XYZ calibration cube. The measurements are bang on as before, but I will need to make some adjustments, either to my printer, my bed leveling technique, my slicer settings, or something else I haven't thought of. I'm now about 1/3 of the way through printing the dog model that came with the printer, and from what I can see it looks pretty good so far.
-
Update: The sample dog has finished printing, and I'm very impressed by it. On the cube from before, I can see the layer lines clear as day, but on this dog they're invisible unless I look really close at it. And it also came with a breakaway platform that I understand is called a raft, which solved the first layer/bed adhesion problems I thought might happen, and also came off almost perfectly cleanly without any tools.
-
Speaking of this, you should print your avatar. It already looks like a 3D print that's gone wrong

-
@Polygeekery said in Today in Blakeyrat is always several years behind in every tech trend news...:
tramming the gantry
Is that what the kids are calling it these days?
-
@hungrier said in Today in Blakeyrat is always several years behind in every tech trend news...:
The sample dog has finished printing, and I'm very impressed by it. On the cube from before, I can see the layer lines clear as day, but on this dog they're invisible unless I look really close at it.
The more curves a print has, the more the layer lines are obscured. The more planar a print is the more noticeable they will be. Also, layer lines become less obvious when you run very small layers, more noticeable with thick layers.
@hungrier said in Today in Blakeyrat is always several years behind in every tech trend news...:
And it also came with a breakaway platform that I understand is called a raft, which solved the first layer/bed adhesion problems I thought might happen
Rafts will compensate for almost all leveling issues. If you think about it, you're laying down a large section of material before you start your print. After it gets done printing those raft layers the top of the raft has to be level with the print gantry by its very nature. If rafts did not waste time and material you would use them on every print But they do, so you don't unless you have to.
@hungrier said in Today in Blakeyrat is always several years behind in every tech trend news...:
and also came off almost perfectly cleanly without any tools.
Yep, that is due to the air gap that the slicer places between the raft and the print. You can see it in the slicer settings below:
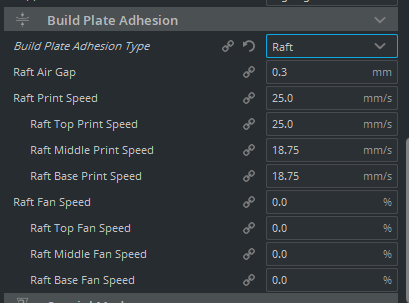
Essentially, if you are printing at 0.2mm layer height then it skips a layer and a half causing intentionally poor layer adhesion for easy removal of the raft. When printing ABS in an enclosure where your ambient air temperature is a lot higher it is pretty easy to end up in a situation where the raft will not remove cleanly or easily.
-
@Zerosquare said in Today in Blakeyrat is always several years behind in every tech trend news...:
Speaking of this, you should print your avatar. It already looks like a 3D print that's gone wrong
Or a very specific type of 3D print gone right.
https://www.youtube.com/watch?v=6RRwLLY5uS4
I've never tried printing one because I'm more of a functional print sort of person but they are pretty cool.
-
I got my replacement part from Comgrow, and they really went above and beyond:
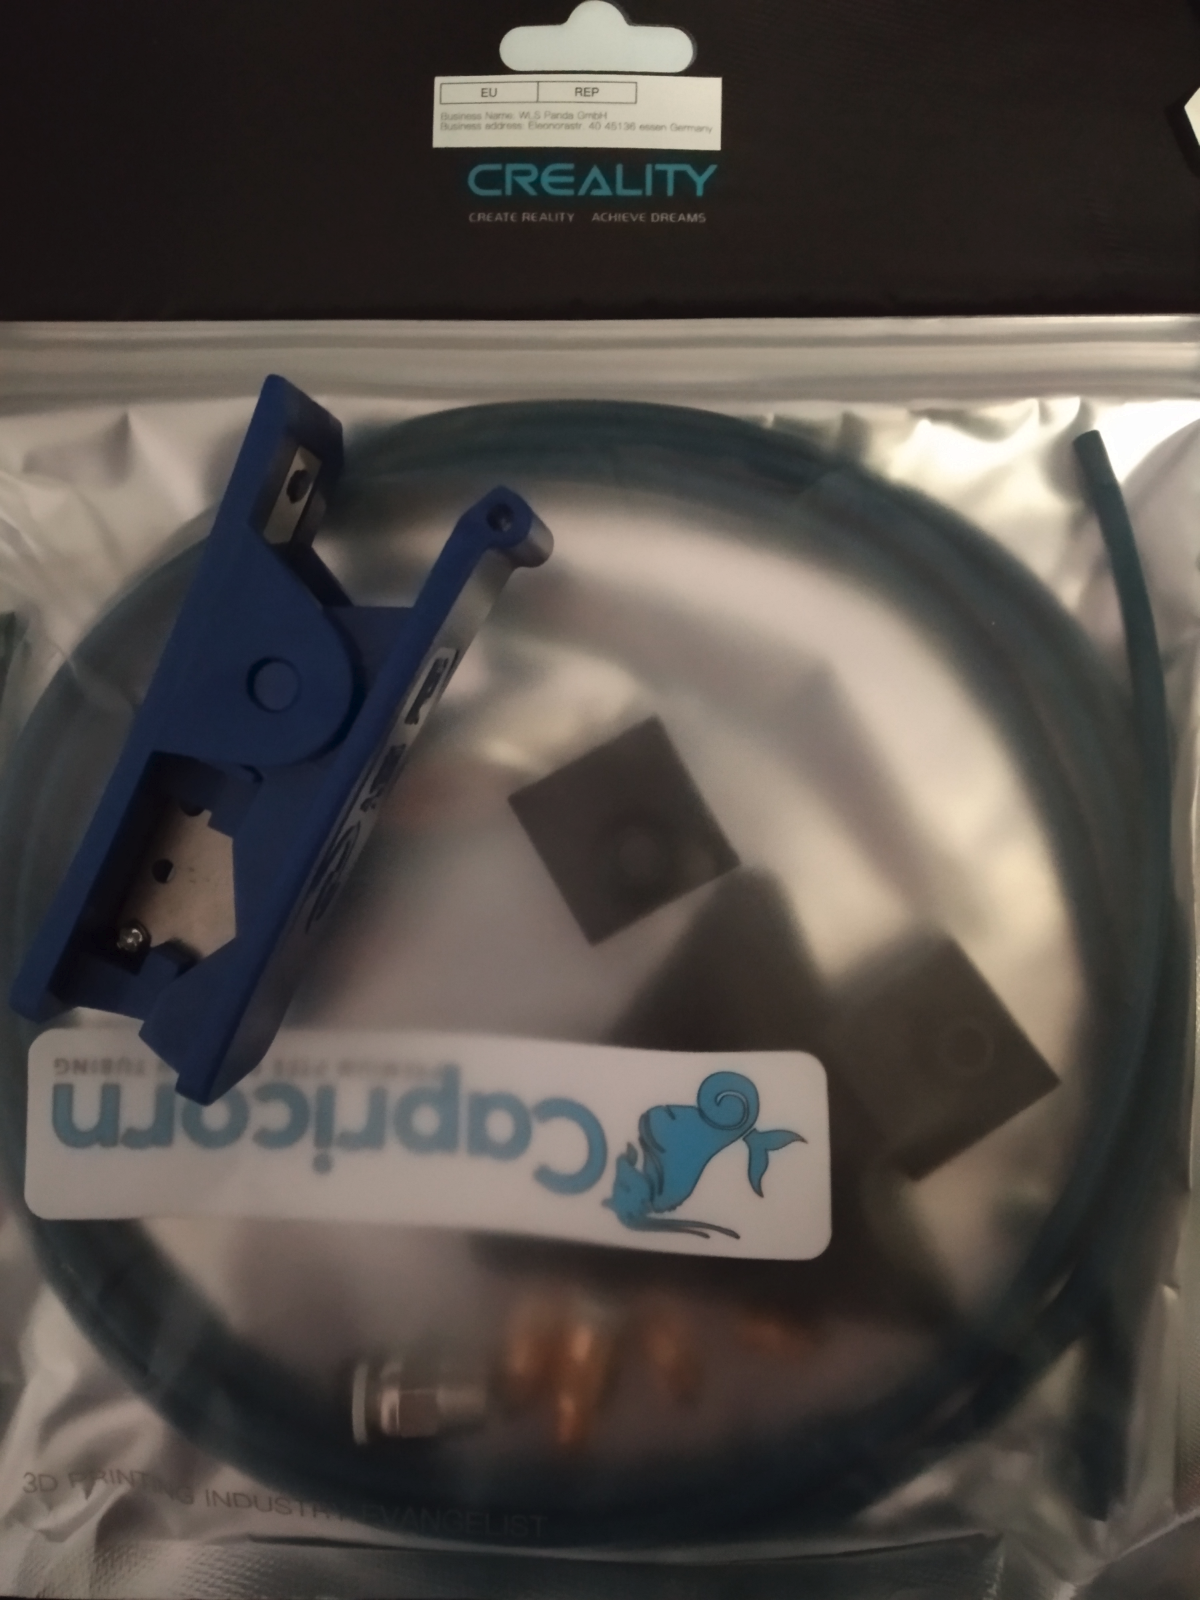
All I was missing was the connector for the extruder, and they sent me a kit with:
- that connector, as well as a connector for the hot-end
- three replacement nozzles and rubbers
- 2m of Capricorn tubing (hopefully genuine, but I have no reason to doubt that it is)
- a tube cutting tool
-
@hungrier said in Today in Blakeyrat is always several years behind in every tech trend news...:
they really went above and beyond
A happy customer is a returning customer
-
@Polygeekery, about the Photon S, I just noticed Anycubic has them back in stock, still at the discounted price (for another 23 hours). It's available with a choice of a starter supply of resin and FEP film (what's that used for?) or the Wash & Cure Machine. How useful/necessary is that? Is it worth getting that rather than the starter resin/film kit?
-
@HardwareGeek said in Today in Blakeyrat is always several years behind in every tech trend news...:
FEP film
It is the film that is on the bottom of the resin vat. It is a wear item. As you print and clean resin out of the vat to change resins it gets scratched and such, necessitating occasional replacement.
I'd get the wash and cure station. Probably. They seem like something handy to have. But here's what I use for washing prints:
I have two with denatured alcohol in the. I use a sort of deprecation tiering. One has more used solvent and the other has fresher stuff. As the older solvent gets too used for a first wash it gets tossed and then my solvent used for final rinse gets moved to first rinse and I pour new to use for final rinse.
That was awkwardly explained. I hope it made sense.
Then I cure them in sunlight. When a resin print is finished it is still a bit on the soft side. It needs a bit more UV exposure to really finish curing.
FEP film can be pretty expensive to purchase, but you can purchase off brands. You just need sheets large enough to fit. They're trimmed as the final part of install. Oh, and don't forget to take the protective film off of each side. I ruined a brand new piece of FEP because of that. There's no way to remove it after installation.
-
@Polygeekery Thanks and done. Printer w/ Wash and Cure Machine, 3 kg of plant-based resin (black, white, and clear; unfortunately, they're out of the special resin for casting, but I have no immediate need for it, anyway, and it costs ~2x the normal resin), and package of FEP film.
Just got an email from PayPal: Receipt for Your Payment to string of Chinese characters that are complete gibberish to me.
@Polygeekery said in Today in Blakeyrat is always several years behind in every tech trend news...:
That was awkwardly explained. I hope it made sense.
Absolutely. The explanation isn't the clearest, but I know exactly what you mean.
When a resin print is finished it is still a bit on the soft side. It needs a bit more UV exposure to really finish curing.
I'd guess that for the prints I intend to cast, that's not much of an issue, since the resin is going to be melted/burned away almost immediately. But since I'm not going to be doing that for a while, I'll be printing stuff (I'm not quite sure what) where the print will be the final product, so I'll need to cure them.
-
@HardwareGeek said in Today in Blakeyrat is always several years behind in every tech trend news...:
I'd guess that for the prints I intend to cast, that's not much of an issue, since the resin is going to be melted/burned away almost immediately. But since I'm not going to be doing that for a while, I'll be printing stuff (I'm not quite sure what) where the print will be the final product
I have to wonder if since your endgame is to make miniatures if a SLA printer might suit your needs as-is? Sure, they won't be metal, but the detail and resolution of SLA printers are pretty amazing. There's a guy on YouTube that does miniatures like that. They're pretty cool.
I think it was this guy?
-
Update on my adventures: I've been fiddling with various slicer settings to try to get some consistency in my prints, and I've been able to muddle through printing some minor upgrade pieces (cable management clips, pressure fitting spacers, filament guide) as well as a couple more test prints with various combinations of rafts, brims, and the rare piece that works without anything.
My bed leveling technique has got a bit better, and I found that my print surface has a low spot in the middle that I built up a bit with some aluminum foil, but I plan on upgrading the firmware with a newer one with mesh leveling pretty soon. Eventually I'll probably get one of those spring steel replacement print surfaces.
I've still got a bit of the included filament left, but once that runs out I've got a new roll. It came with a bunch of instructions for properly changing it over (something like cleaning out the nozzle by inserting some other hard plastic directly in the hot-end), but is all that shit really necessary or can I just feed through a bit of the new stuff and clean out the old one with that?
e: I also looked into setting up OctoPrint on my Macbook, but as it turns out it's a huge pain in the ass on OSX and from what I've read, half the stuff might not work anyway. So my alternate idea for that is to find the charger for another old laptop and use that as my Octoprint server. That laptop is a huge brick and has no webcam, but it'll be better than nothing.
-
@Polygeekery said in Today in Blakeyrat is always several years behind in every tech trend news...:
since your endgame is to make miniatures
I'm not sure where you came up with that, but not really. I think we discussed my endgame privately at some point, but I'm not seeing it in my

 chat history. Maybe it was way back in the
 era? Anyway, my ultimate endgame is items in which the metal it's made of is a significant part of the value of the item. (I'm looking at someday doing this as a part-time/retirement business. I'm pretty careful about my anonymity here, but I still don't want to go into detail publicly until I get a business entity created and insured against theft. And I really can't do that from home with the lease terms I have.) However, there are applications I can think of for what would technically be miniatures (model railroad figures and scenery) for which the resin print would/could be the end product. I might print gaming miniatures, but so far all the "table-top" gaming I've done has been virtual, so I've had no need/desire for physical miniatures.
-
@hungrier said in Today in Blakeyrat is always several years behind in every tech trend news...:
I got my replacement part from Comgrow, and they really went above and beyond:
All I was missing was the connector for the extruder, and they sent me a kit with:
- that connector, as well as a connector for the hot-end
- three replacement nozzles and rubbers
- 2m of Capricorn tubing (hopefully genuine, but I have no reason to doubt that it is)
- a tube cutting tool
You should work out a way to print those.
-
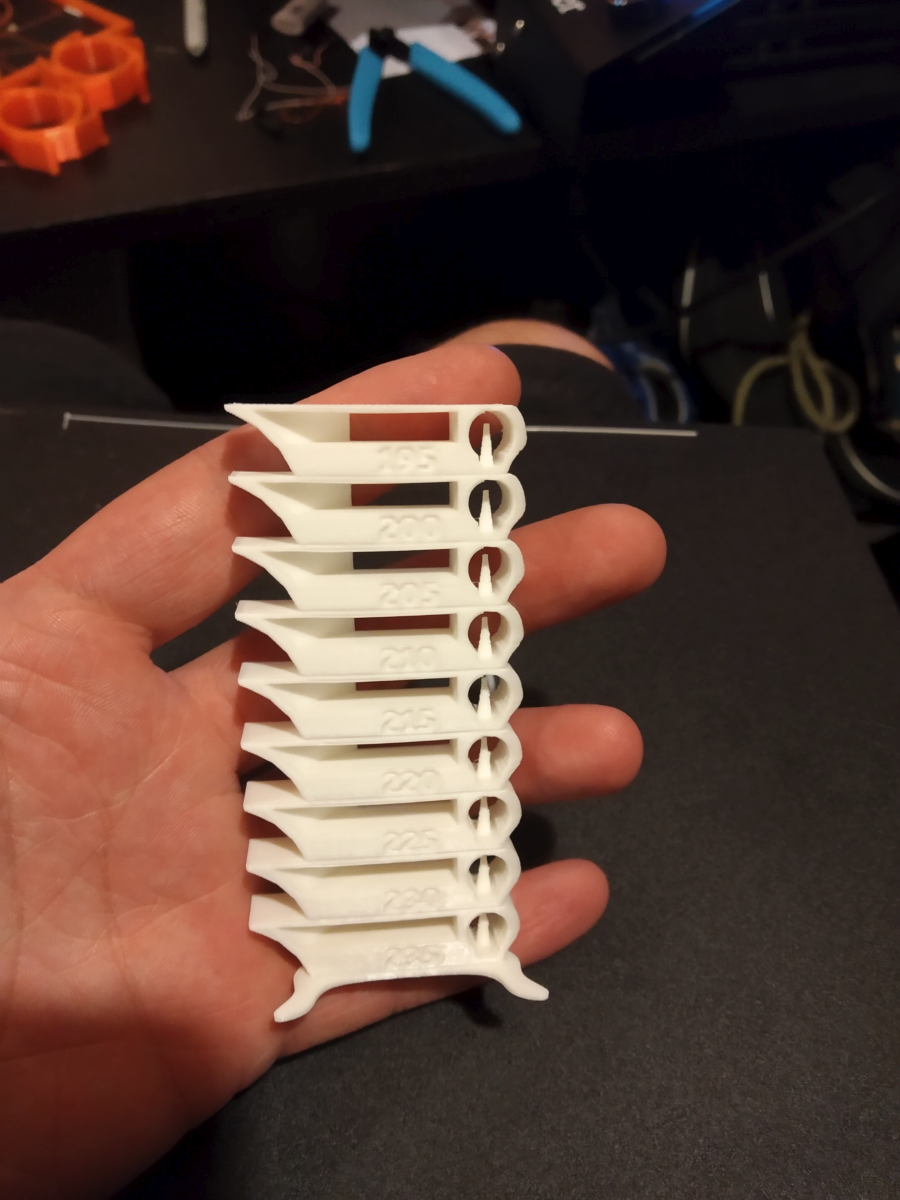
Update: After trying a bunch of shit that didn't work at all on my Macbook, I found my old laptop charger and was finally able to hook up Pronterface and run commands on the thing. Turns out I was severely under-extruding, and after I fixed that setting most of my problems magically went away. I did a bunch of test prints (temperature tower, retraction test towers, single layer wall, bridging, maybe other ones I can't recall) and pretty much everything was perfect.
I also got some new filament, a two-pack of black and white PLA+ which happens to be crazy cheap, and works great throughout the entire PLA+ temperature range:
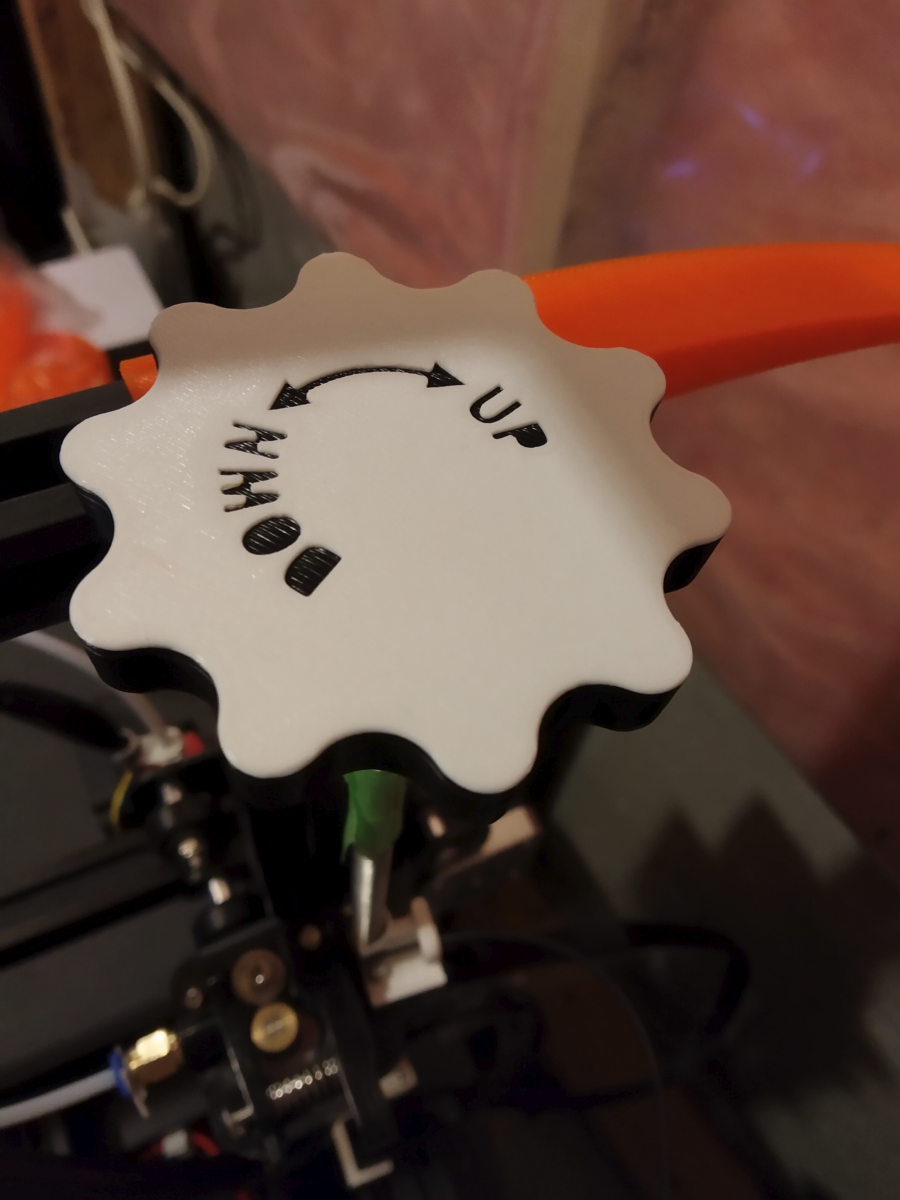
The stock firmware that came with the printer is old AF, and doesn't support fancy things like the "pause to change filament" g-code command, but I managed to do a nice two-tone job with some careful manual pausing:
Next steps:
- install bootloader and update firmware
- get one of those spring steel bed surfaces
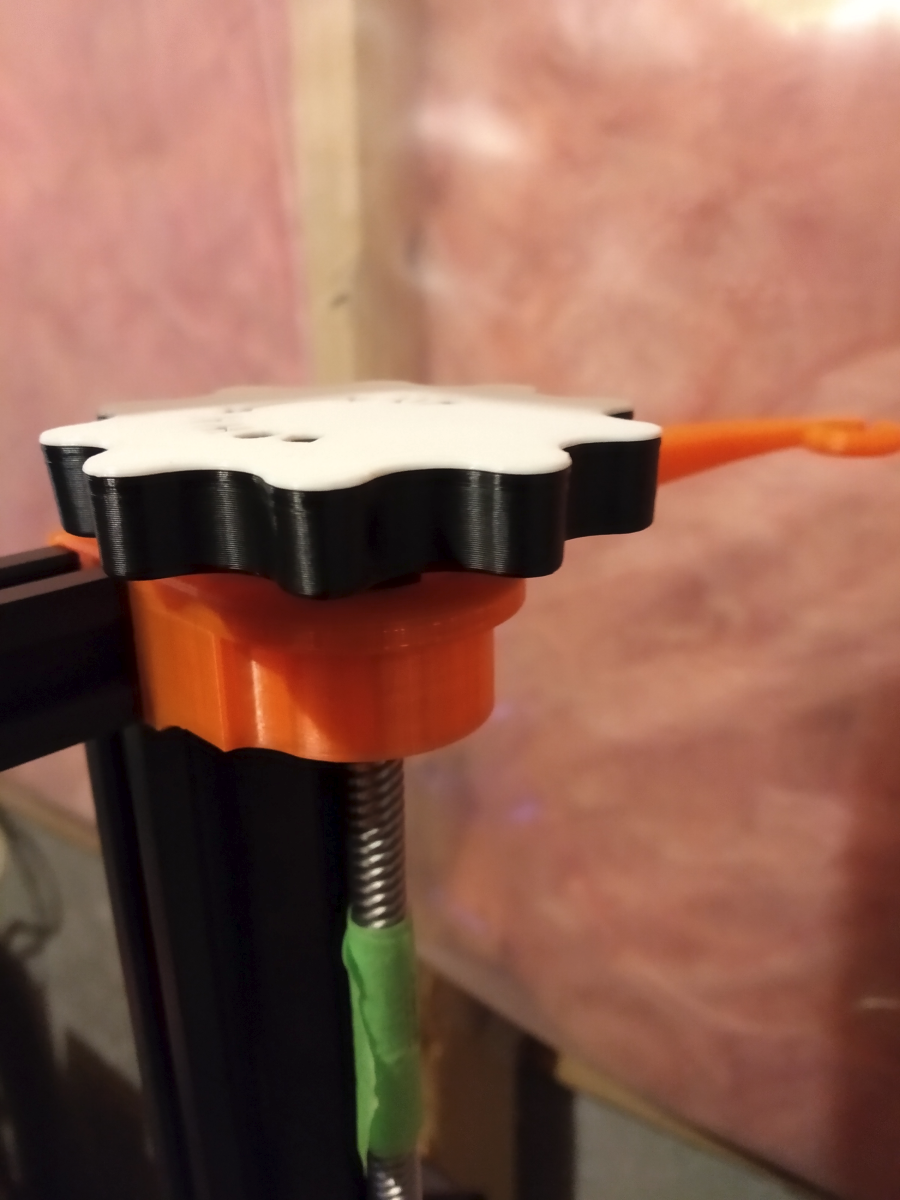
- maybe reprint some of the old upgrade parts with proper extrusion (e.g. the orange stabilizer/filament guide)
- learn how to use FreeCAD
-
Speaking of the spring steel surface, can I use it with my existing magnetic heated bed or do I need to get the version with the magnetic sticker included? It seems like it should just work, but I don't want to wait for it to arrive, then realize I have to buy another extra thing. Is there anything special about the magnetic sticker for this thing, or is that just for printers that don't already have it?
-
@hungrier said in Today in Blakeyrat is always several years behind in every tech trend news...:
I plan on upgrading the firmware with a newer one with mesh leveling pretty soon.
If you're going to do that I would suggest you upgrade the mainboard at the same time. The SKR Mini series of boards are a direct replacement. The SKR 1.4 or 2.0 are a not so direct replacement and more involved, but you get a lot more I/O and possibilities. But that swap is not for the new or faint of heart. You're probably going to end up rewiring some things. The Mini can be swapped in without any wiring changes, IIRC.
Once you get a new board loaded with vanilla Marlin then you can start enabling some of the handy features, like assisted tramming and the bed leveling wizard. It will move your print nozzle over each leveling bolt in turn and save you from having to move it by hand. It also keeps the Z-axis stepper energized so there is no chance of it drooping on its own.
But most importantly is that either board will allow you to easily add a BLTouch. My upgrade path for any n00b would be: extruder replacement (because of the underextrusion you found), spring steel print surface, silicone bed springs (they maintain level better than the alternatives), board swap, BLTouch.
@hungrier said in Today in Blakeyrat is always several years behind in every tech trend news...:
I've still got a bit of the included filament left, but once that runs out I've got a new roll. It came with a bunch of instructions for properly changing it over (something like cleaning out the nozzle by inserting some other hard plastic directly in the hot-end), but is all that shit really necessary or can I just feed through a bit of the new stuff and clean out the old one with that?
Just run the new filament through. When you go to unload you can do so at the print temperature of the currently loaded filament. Purge at the print temperature of the filament you are loading. This is assuming that there is a significant difference in material. If you are swapping PLA for PLA it doesn't matter. Just run filament through until you observe a complete color change to the new filament and then a bit more for good measure.
@hungrier said in Today in Blakeyrat is always several years behind in every tech trend news...:
I also looked into setting up OctoPrint on my Macbook, but as it turns out it's a huge pain in the ass on OSX and from what I've read, half the stuff might not work anyway. So my alternate idea for that is to find the charger for another old laptop and use that as my Octoprint server. That laptop is a huge brick and has no webcam, but it'll be better than nothing.
If you have an old Raspberry Pi use that. If you don't then any other hardware should work. Even a Raspberry Pi 2 or 3 is more than fine. A Raspberry Pi 4 is better, but the only real significant difference is the initial load time when you open the page. OctoPrint isn't too computationally intense on its own. If you start using ArcWelder it can be, sort of, but still not too bad.
I came up with an i7 HP ProDesk machine the other day and I'm considering loading it up with Proxmox or something similar to run multiple OctoPrint instances. You can do it with multiple instances on one machine, but that always seemed cumbersome and prone to failure.
-
@hungrier said in Today in Blakeyrat is always several years behind in every tech trend news...:
The stock firmware that came with the printer is old AF, and doesn't support fancy things like the "pause to change filament" g-code command, but I managed to do a nice two-tone job with some careful manual pausing:
Good job. One reason I would suggest the SKR 1.4 or 2.0 boards is that you can run 5 steppers which allows you to either run a second Z axis stepper or a second extruder stepper. Couple that with one of these:
And you can do dual extrusion for cheap. It's almost a direct swap for the Ender3 hotend.
@hungrier said in Today in Blakeyrat is always several years behind in every tech trend news...:
install bootloader and update firmware
If you already have an ISP programmer, go for it. But if you don't I would honestly put that money towards a SKR Mini.
@hungrier said in Today in Blakeyrat is always several years behind in every tech trend news...:
get one of those spring steel bed surfaces

@hungrier said in Today in Blakeyrat is always several years behind in every tech trend news...:
learn how to use FreeCAD
Maybe. I tried it and it was problematic. The UI/UX really sucks. Give Fusion 360 a try.
Another option for programmers is OpenSCAD. You are essentially doing CAD via a scripting language. I find it very difficult to use for anything non-trivial but I did not grow up as a programmer. It could be easier for you. You do you.
-
@hungrier said in Today in Blakeyrat is always several years behind in every tech trend news...:
Speaking of the spring steel surface, can I use it with my existing magnetic heated bed or do I need to get the version with the magnetic sticker included? It seems like it should just work, but I don't want to wait for it to arrive, then realize I have to buy another extra thing. Is there anything special about the magnetic sticker for this thing, or is that just for printers that don't already have it?
I believe you can use the stock one. I know I have changed out at least one, but I think it was for some other reason than just not working. I likely damaged the original one. I say keep the replacement as spare parts and only install it if you need to.
-
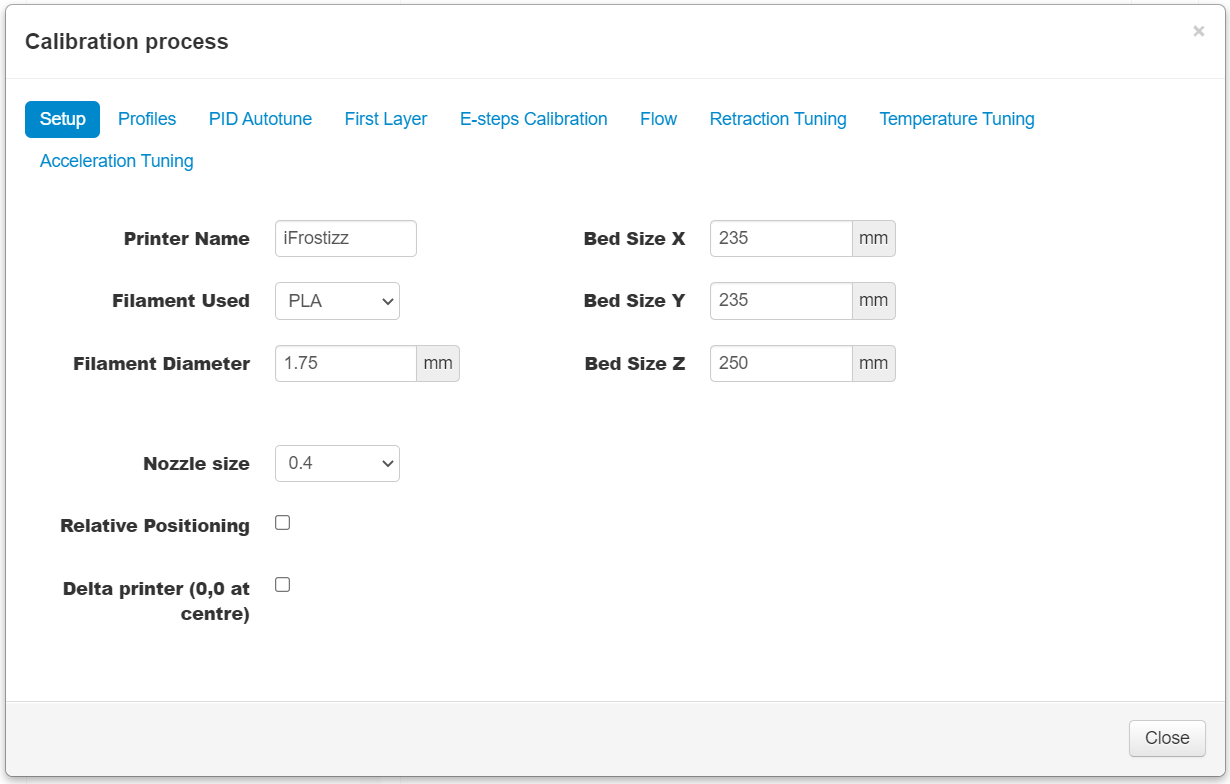
@hungrier since you've gotten into the calibration models you should check out this plugin for OctoPrint:
-
@Polygeekery said in Today in Blakeyrat is always several years behind in every tech trend news...:
The SKR 1.4 or 2.0 are a not so direct replacement and more involved, but you get a lot more I/O and possibilities. But that swap is not for the new or faint of heart. You're probably going to end up rewiring some things.
To add a bit of color to this:
My preference is to go the full size SKR board route, but partially because I like using this arrangement:
 AIO Electronics Enclosure (SKR/Stock + RPI 3/4 + MeanWell-350 + 2Mosfets) by volkaster
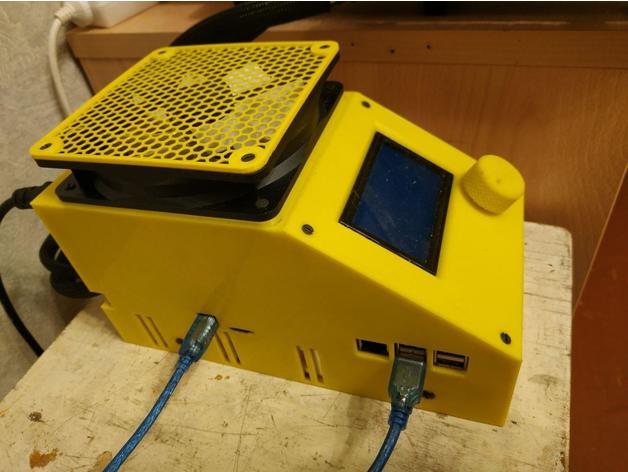
!!!!COMPATIBLE ONLY WITH ENDER 3 PRO (MeanWell LRS-350) PSU!!!! Standard Ender 3 PSU version - https://www.thingiverse.com/thing:4821213 For chassis already cut for ease of print - see remixes section! October 24 Update: Added left sides for Raspberry Pi4 installation There are dozens of fan grills...
But it is pretty involved as a swap. The SKR Mini is very beginner friendly.
But if you move everything to an external electronics enclosure you can moving your power supply and electronics away from the printer and potentially getting them away from the heat if you decide to incorporate an enclosure to print ABS and other higher temperature materials. I also setup my Pis to use the GPIO serial connection hooked to the TFT serial connection on the SKR board so there is no need to use an external USB cable. It is cleaner overall. Plus it is overall much quieter and easier to work on.
That enclosure also has provisions to mount LM2596 buck converters so you can power things that require voltages other than 24V. I have a 5V one to power the Pi and a 12V one for some fans. 12V fans can be easier to source and cheaper than their 24V counterparts. There are ways around that though. In some cases I will wire two 12V fans in series and then power that with 24V.
Something else to keep in mind is that, at least all of the boards I have used, switch the ground. So you can tie your LM2596 and mainboard grounds together and then supply voltage with the buck converter and connect ground to the board. That is how you are able to switch devices that are not 24V. PWM on the supply side of a buck converter is going to be
 . PWM on the ground side is no issue as far as I know.
But it is a lot of work. In theory you could extend the stock cables, but it is cleaner to start from scratch and wire it all from square one.
There are probably other options that would just attach to the extrusions and would not require all that work. Thingiverse has tons of such things. The one I linked is just the route that I went.
-
In addition to the Photon S that I ordered, my son told me last night that he's getting an Ender. He has a buddy who's also into Nerf® modding and has done a lot of printing for my son. Apparently, he scored an Ender (I'm not sure exactly what model) at a really good price, and he's sending it to my son so they can collaborate on printing upgrades for their
weapons of mass destruction(mostly) harmless foam dart toys.
-
@Polygeekery said in Today in Blakeyrat is always several years behind in every tech trend news...:
If you're going to do that I would suggest you upgrade the mainboard at the same time. The SKR Mini series of boards are a direct replacement. The SKR 1.4 or 2.0 are a not so direct replacement and more involved, but you get a lot more I/O and possibilities. But that swap is not for the new or faint of heart. You're probably going to end up rewiring some things. The Mini can be swapped in without any wiring changes, IIRC.
I'll keep those replacement boards in mind for the future, but for now I'll try to keep going with what I have until I run into some insurmountable limitation. The mesh bed leveling is the most important feature for me because my bed isn't completely flat, but that might no longer be the case after I get the spring steel replacement. I've also got a dual-gear extruder on my list for the future.
About upgraded springs, would this kit be a good one? That's the one I put i my list a little while ago, and I assumed the springs were metal but now that you've mentioned silicone springs I'm not so sure.
@Polygeekery said in Today in Blakeyrat is always several years behind in every tech trend news...:
If you have an old Raspberry Pi use that. If you don't then any other hardware should work. Even a Raspberry Pi 2 or 3 is more than fine. A Raspberry Pi 4 is better, but the only real significant difference is the initial load time when you open the page. OctoPrint isn't too computationally intense on its own. If you start using ArcWelder it can be, sort of, but still not too bad.
I haven't got a Raspberry Pi, so the plan for now is to repurpose my old laptop as I've already half-done.
@Polygeekery said in Today in Blakeyrat is always several years behind in every tech trend news...:
If you already have an ISP programmer, go for it. But if you don't I would honestly put that money towards a SKR Mini.
I've got an Arduino Uno that I can use for that, just waiting for some jumper cables to come in so I can physically connect it.
@Polygeekery said in Today in Blakeyrat is always several years behind in every tech trend news...:
Maybe. I tried it and it was problematic. The UI/UX really sucks. Give Fusion 360 a try.
So far I've followed along with a tutorial video and did some basic stuff on my own after, and I kind of like the way it works. I'll see if I still like it after trying something more advanced than a cylinder with a hole in it.
OpenSCAD, I might try that out as well. I've come across some parametric objects (e.g. screws with settable thread size and length) and the idea of programming things like that sounds quite powerful.
@Polygeekery said in Today in Blakeyrat is always several years behind in every tech trend news...:
@hungrier since you've gotten into the calibration models you should check out this plugin for OctoPrint:
Looks good, once I get Octoprint set up I'll do that. For now I've been using scripts in Cura and the Cura calibration part plugin.
-
@hungrier said in Today in Blakeyrat is always several years behind in every tech trend news...:
I'll keep those replacement boards in mind for the future, but for now I'll try to keep going with what I have until I run into some insurmountable limitation. The mesh bed leveling is the most important feature for me because my bed isn't completely flat
You're going to hit that really soon. 8-bit boards have a very limited amount of address space, and therefore a very limited amount of space for firmware. You will quickly run in to making a choice as to what features you want to keep and which you want to disable to fit in memory. Like I said, if you are already able to burn a bootloader then you have no costs other than your time. If you have to buy a programmer then I would just get the SKR Mini.
I think I spent around $15 for my FTDI programmer, about the same for my CH341. A SKR Mini is ~$50. If you have a programmer and it is a sunk cost then roll with it for now. If you don't, I would seriously put that $15 towards the SKR Mini. But you do you boo.
@hungrier said in Today in Blakeyrat is always several years behind in every tech trend news...:
About upgraded springs, would this kit be a good one? That's the one I put i my list a little while ago, and I assumed the springs were metal but now that you've mentioned silicone springs I'm not so sure.
I would suggest this one:
The springs that you linked are metal, but I like the silicone ones better. I think the metal parts change their properties when heated a lot more than the silicone springs do.
@hungrier said in Today in Blakeyrat is always several years behind in every tech trend news...:
I haven't got a Raspberry Pi, so the plan for now is to repurpose my old laptop as I've already half-done.
Fair enough. Sunk cost.
@hungrier said in Today in Blakeyrat is always several years behind in every tech trend news...:
I've got an Arduino Uno that I can use for that, just waiting for some jumper cables to come in so I can physically connect it.
Fair enough. Just keep in mind the memory limitations you will run into fairly quickly. Part of the reason that the Creality firmware does not have a bootloader is because they did not really have room to spare in firmware. 32-bit boards give you many times the space that 8-bit boards do.
@hungrier said in Today in Blakeyrat is always several years behind in every tech trend news...:
So far I've followed along with a tutorial video and did some basic stuff on my own after, and I kind of like the way it works. I'll see if I still like it after trying something more advanced than a cylinder with a hole in it.
Different strokes for different folks. I like Fusion 360 because it seems to fit how my mind works a bit better. But use what works for you.
@hungrier said in Today in Blakeyrat is always several years behind in every tech trend news...:
OpenSCAD, I might try that out as well. I've come across some parametric objects (e.g. screws with settable thread size and length) and the idea of programming things like that sounds quite powerful.
All three can do parametric design, but OpenSCAD is probably better about enforcing its use as part of design intent. I would suggest looking over videos by Maker's Muse on YouTube. He goes through Fusion360, but the lessons on constraints and design intent are useful across all CAD softwares.
Start with your knowns, build out from there. Use constraints and relations where possible, versus using defined dimensions that lock things in place with no design intent. When you start out nothing will be a parameter and you will just directly draw things. Then you will start to use parameters. Then you will overuse parameters and everything will be a parameter. After that you will likely learn the happy medium on parametric design.
Also, learn what the tolerances are that your printer needs and where you need to insert those. When you setup your workspace you can include a parameter of "Tolerance". On some parts you may need to add or subtract 1X tolerance, on other 2X tolerance, depending on how many sides it interfaces with other parts at. After a while that will start to make sense and then you can just add that in where appropriate and if things don't fit on test prints you can change one parameter and be done with it.
For constraints, at first those will seem almost random in usage and you will likely not use them properly. Constraints need to be driven by design intent. This video helped me immensely:
https://www.youtube.com/watch?v=b27GKqMn_9U
I really hope you have a few fuckups on constraints like I did where you apply constraints that make no sense in respect to design intent, then you change some dimension and your design turns inside out like an Escher print as it attempts to make sense of the math that no longer makes sense. It's really fun when even Ctrl + Z won't even get you back to normality. Fun times.
CAD is just math on 3D shapes. Adding geometry, subtracting geometry, etc.
Lastly, and probably most importantly, you will fuck some things up when learning CAD. Do a post mortem and figure out where you went wrong and learn from it and it is a pretty quick learning process.
-
@hungrier said in Today in Blakeyrat is always several years behind in every tech trend news...:
For now I've been using scripts in Cura and the Cura calibration part plugin.
I find that several of their test models have obnoxiously thick bases. If you want to make your calibration prints run more quickly you can sink them below the Z minimum and it will only print the part that is left. Less solid layers will make your prints much quicker and use less material.
-
@Polygeekery said in Today in Blakeyrat is always several years behind in every tech trend news...:
For constraints, at first those will seem almost random in usage and you will likely not use them properly. Constraints need to be driven by design intent. This video helped me immensely:
This one goes hand in hand with it, showing how to use dimensions driven by design intent.
His entire Cad for Newbies series is pretty good as a primer.
-
@hungrier said in Today in Blakeyrat is always several years behind in every tech trend news...:
I've been fiddling with various slicer settings to try to get some consistency in my prints
Oh, I meant to come back to this.
Slicer settings will rarely fix issues early on. In fact, it is good way to make things worse.
There are several known good profiles for the Ender 3 that you can import into your slicer. I think the guy on YouTube that goes by CHEP has some that are well thought of. PrusaSlicer has inbuilt profiles for the Ender 3 now that are available at install. But dicking around with things too much can:
- Make things worse
- Fix problems the wrong way and without you knowing it
For example, your underextrusion issue. I assume that you fixed it by calibrating your e-steps? (
 )
)You can also, sort of, fix that issue with your extrusion multiplier. But it is a crutch.
So, e-step calibration compensates for the difference in effective diameter of your extruder gear. Depending on how far the teeth bite into a material, how much pressure your extruder springs apply, how malleable your filament is, a number of other factors, the effective diameter of the extruder gear can change, potentially by quite a lot.
If we look at the extruder gear of a stock Ender 3 the OD at the top of the teeth reads 10.95mm when I measure it. At the bottom of the teeth the base OD measures 10.80mm.
If the filament is riding perfectly right on top of the teeth you get a circumference of 34.40 mm, if the teeth are biting fully into the filament you get a circumference of 33.93 mm, which doesn't seem like a lot but it means you are laying down a couple of percent less plastic than you thought that you were. The effect becomes more dramatic when you realize that Creality probably put in their base e-steps number based on a 11mm and not 10.95mm.
These variations become less dramatic when you move to something like the Bondtech BMG, which has very fine pitched hobbing on the gears with less of a gullet. The dual gear extruder I mentioned as the first upgrade has the same type of gears, drives the filament from both sides and shares a lot of characteristics with the BMG except for the gear reduction which is not a good idea on a Bowden setup anyway.
But back to where I started, you can use the extrusion multiplier as a crutch to make up for the fact that your e steps are off. But because of the way that your firmware works and how the multiplier is utilized it will not scale as well to print speed causing inaccuracies as you vary the speed very far from where you adjusted your extrusion multiplier to compensate. Features like Linear Advance, coasting and junction deviation can behave unpredictably when you have used extrusion multiplier to fix what is actually an e-steps issue.
Where extrusion multiplier is really helpful is on bridging settings. When you are trying to bridge a gap without using supports you can drop your multiplier to ~90% or less for that first layer and your nozzle will be "dragging" the filament and keeping it taut making it easier to bridge the gap cleanly.
Make sense? Clear as mud?
But changing a lot of slicer settings is a good way to waste some filament until you get some experience.
 https://www.amazon.com/dp/B06WD1F7HD/ref=cm_sw_r_cp_apa_glt_fabc_51BDCY4TYAX8JTAC7WWB
 Calibration Companion