Today in Blakeyrat is always several years behind in every tech trend news...
-
@hungrier said in Today in Blakeyrat is always several years behind in every tech trend news...:
No, in my excitement I forgot to order it even though I had thought about it before.
Better get some ordered. I think they only come with ~100g, which is just enough to print one of the test prints on the SD card.
Just order PLA for now. It prints very easily and isn't too fussy on settings. I think I noticed the other day that they had a five roll package for ~$95USD. Black, gray, red, blue and white, IIRC.
Oddly enough, I got my first 3D printer the day that Lexi first got really sick and my first print was the dog test print that came pre-sliced with the printer. I still have that print for sentimental value.
-
-
@Polygeekery For now I'm going to just get one spool to start. Aside from Amazon Basics, are there any other good brands for filament? Any to avoid?
-
@hungrier honestly, all the ones I have found on Amazon have been pretty good. I used to be partial to Overture, Hatchbox and AmazonBasics but back during the virus of unknown origins consumer products apocalypse I was ordering whatever I could get in order to print masks. All of them worked fine. eSun, Dikale, Sunlu, Gizmo Dorks, 3D Solutech (this one was the worst of the lot, but still printed pretty well, maybe avoid that one now that everything is pretty available again), TecBears (no issues and it is super cheap), all of them worked. I've printed them all and 3D Solutech was the only one that I remember giving me minor issues.
I probably print Gizmo Dorks the most, but that is because I can easily get 5kg spools of their stuff off of Amazon.
-
@HardwareGeek said in Today in Blakeyrat is always several years behind in every tech trend news...:
no FOOF allowed
Anything that can burn concrete blocks, or buckets of wet sand, is something I would categorically not want anywhere close to the house. (That's not an exhaustive list, BTW.)
-
Wondering for casting. Is there any point in using something like PVA that you can wash out with water? Obviously depends a great deal on what material you cast into. If it's relatively loose sand, that's probably not a great idea.
-
@cvi In the lost-wax process, water-soluble wax is used occasionally, but AFAIK it's used only for cores for making hollow objects. A (partial) shell of regular wax is built up over the core and sculpted to the desired shape, then the core is dissolved and the space filled with the mold compound (through the openings in the partial shell). That wouldn't be necessary for 3D printing, since it can form hollow shapes. Nor would water-soluble plastic be necessary for casting a metal where the mold would be heated anyway; the plastic can be removed in the heating process.
Maybe if the material to be cast is cold, like a resin or very low-melting metal, but even then I see at least one problem. The molds used in lost-wax (or plastic) casting are rigid, one-piece molds. There aren't two or more pieces that can be separated to remove the model, so it would be difficult to flush PVA residue out of the mold cavity. (This also means the molds are single-use; the only way to remove the finished casting is to destroy the mold. Both the model and mold are destroyed in the casting process, so mass production this ain't.)
-
@HardwareGeek said in Today in Blakeyrat is always several years behind in every tech trend news...:
water-soluble wax
I'm sure there's a lot of things that this could mean, but at first glance the idea of water-soluble wax made me go

-
@Benjamin-Hall I don't know what's it's made of, but in my very limited experience with it, it seemed to me to be rather hard, brittle, and crystalline compared to ordinary waxes. I don't know, but I kinda suspect something like stearic acid (a common additive to candle wax) or sodium stearate is a significant component.
-
@HardwareGeek said in Today in Blakeyrat is always several years behind in every tech trend news...:
@Benjamin-Hall I don't know what's it's made of, but in my very limited experience with it, it seemed to me to be rather hard, brittle, and crystalline compared to ordinary waxes. I don't know, but I kinda suspect something like stearic acid (a common additive to candle wax) or sodium stearate is a significant component.
Yeah. I'm sure it can be done, but the difference from the standard made me mentally blue-screen temporarily. It was such an auto-antonym.
Like saying "best implemented in Javascript" or "military intelligence" or <a bunch of thoroughly garage things preemptively suppressed/>.
-
@Polygeekery said in Today in Blakeyrat is always several years behind in every tech trend news...:
@Polygeekery said in Today in Blakeyrat is always several years behind in every tech trend news...:
Would anyone be interested in a write up on what I would do differently if I had to start out from the beginning knowing what I know now? I've given it some thought, including some branching depending on what one might want to do. Since @hungrier asked for input I have been giving it some thought as to what I would recommend for a n00b that would probably end up getting in to it and want to expand/improve on the hobby.
Next question, do it in this thread or start a new one? I don't care either way.
I would start a new one.
We might have excellent Goofle coverage but it is going to be far easier to find in a new thread.
-
@cvi said in Today in Blakeyrat is always several years behind in every tech trend news...:
Wondering for casting. Is there any point in using something like PVA that you can wash out with water?
Or maybe HIPS?
-
@JBert said in Today in Blakeyrat is always several years behind in every tech trend news...:
@Polygeekery said in Today in Blakeyrat is always several years behind in every tech trend news...:
@Polygeekery said in Today in Blakeyrat is always several years behind in every tech trend news...:
Would anyone be interested in a write up on what I would do differently if I had to start out from the beginning knowing what I know now? I've given it some thought, including some branching depending on what one might want to do. Since @hungrier asked for input I have been giving it some thought as to what I would recommend for a n00b that would probably end up getting in to it and want to expand/improve on the hobby.
Next question, do it in this thread or start a new one? I don't care either way.
I would start a new one.
We might have excellent Goofle coverage but it is going to be far easier to find in a new thread.
A spread-spectrum topic-jumping approach would allow for even more flexibility.
-
So the thing came in and I unpacked it, but it appears to be missing the Bowden connector for the extruder. I can see one preinstalled on the hot end, but not on the extruder, and I've gone over all the rest of the contents of the box a few times and can't find it anywhere. Lets hope Amazon live chat support can help me out.
-
@hungrier said in Today in Blakeyrat is always several years behind in every tech trend news...:
So the thing came in and I unpacked it, but it appears to be missing the Bowden connector for the extruder. I can see one preinstalled on the hot end, but not on the extruder, and I've gone over all the rest of the contents of the box a few times and can't find it anywhere. Lets hope Amazon live chat support can help me out.
Interositor, or encabulator?
-
@hungrier said in Today in Blakeyrat is always several years behind in every tech trend news...:
So the thing came in and I unpacked it, but it appears to be missing the Bowden connector for the extruder. I can see one preinstalled on the hot end, but not on the extruder, and I've gone over all the rest of the contents of the box a few times and can't find it anywhere. Lets hope Amazon live chat support can help me out.
Amazon support directed me to ask the seller a question, and I've now done so. Hopefully they'll get back to me soon
-
The seller got back to me, asked me to verify that I've double checked all the bags, and indeed it's still not there. I sent a reply, and hopefully they'll ship the part soon.
In the meantime, I assembled the thing, and everything I can test seems to be working. The Z motion is excruciatingly slow, and I saw in the menus that the max speed is set way lower than the other axes. For now I'm not going to mess with it, at least until I get the connector. Maybe I'll think of a way to jerry rig it while I'm waiting for the part to come in.
-
@hungrier said in Today in Blakeyrat is always several years behind in every tech trend news...:
The Z motion is excruciatingly slow, and I saw in the menus that the max speed is set way lower than the other axes.
If you get the orbital use model they don't do that.
-
First jerry rig idea lasted through about 10 seconds of printing

-
@hungrier try a jury rig instead
-
@Gribnit I've judged that to be an inferior type of rig
-
Second attempt was even worse, I didn't even take a picture. The third one worked a bit better, but still not actually effective:

-
Just for fun, I tried a different print. This time I used the 20 mm calibration cube off Thingiverse, and sliced it in ideamaker (rather than using one of the models that came on the included SD card). It was working ok for a few layers, much better than the dog that came with the printer, but then it came off the print surface :womp_wah:. The underside looks like a mess too; maybe I need to re-level the bed or something.
On the plus side, though, the X/Y calibration is bang-on perfect

e: This is what the underside looks like

-
@hungrier said in Today in Blakeyrat is always several years behind in every tech trend news...:
the dog that came with the printer
I see you bought the @Polygeekery limited edition of that printer.
-
Has anybody here used Cura's "Gradual Infill" mode? I ended up playing around with it a bit, to reduce the printing time of a larger print that doesn't need to be particularly stable mechanically. But it always ends up generating floating sections of infill that it then tries to build on.
Specifically, this happens when it switches from one level of infill resolution to a higher one. So, with the basic grid infill, it occasionally tries to start printing a higher level in the middle of a grid cell of the lower level. I tried a bunch of different infill patterns, but saw the same thing in all. Kinda makes the feature a bit useless. But maybe I'm missing something.
(While writing this post, I think I might have an idea on how to solve this in a different way -- technically, the model doesn't need to be closed at the bottom, so I can open it up and hopefully use just the standard removable infill. But still.)
-
@hungrier I ended up getting rid of the special magical build plate layer that was supposed to help with adhesion. Now I just print directly on the glass, with a thin layer of glue from one of those glue sticks to make the prints adhere. The glue happens to be water soluble too, which makes it easy to wash of remains after a few prints.
The build plate worked initially for me, but ended up looking quite rough after a few prints and the adhesion wasn't great at that point either (for the first few prints, things really stuck to the plate).
-
@cvi I like the idea of the peelable magnetic surface that my printer has. In theory, after the print is complete, you can just pop it off by peeling the thing. But for that, the print has to stick to the thing in the first place.
-
@hungrier Yeah. That sounds a lot more usable than what I have. My printer came with a plain glass plate and that extra layer that one would glue on the glass plate semi-permanently.
-
@cvi The downside is that it also means I probably can't print ABS or anything that needs a bed temperature above however much, but I can worry about that later.
-
@hungrier Underside looks strange, almost like it isn't quite reaching the build plate. Better Z-calibration? (You're doing the calibration by hand?)
-
@cvi The printer has auto homing, but I'll need to readjust the bed level up to that position with a thinner piece of paper.
e: As for the calibration, I haven't touched any settings yet. I mentioned a couple posts up that X and Y are perfect (the few layers of the 20mm cube are exactly 20mm on each side), so I figure the Z would be good as well right out of the box
-
@hungrier said in Today in Blakeyrat is always several years behind in every tech trend news...:
@cvi The printer has auto homing, but I'll need to readjust the bed level up to that position with a thinner piece of paper.
Do yourself a favor and invest in BLTouch. Bed leveling by hand is a PITA and only becomes more irritating as time goes by.
Also, check if the rail the printing head rides on is perfectly straight. Mine is not and as a result proper leveling without a probe is not possible at all.
-
@MrL I'll look into BLTouch later, but for now I think I'm ok. It'll probably be better when I have the proper part that I'm still missing (unrelated to bed leveling). As for the rail, I think it's fine.
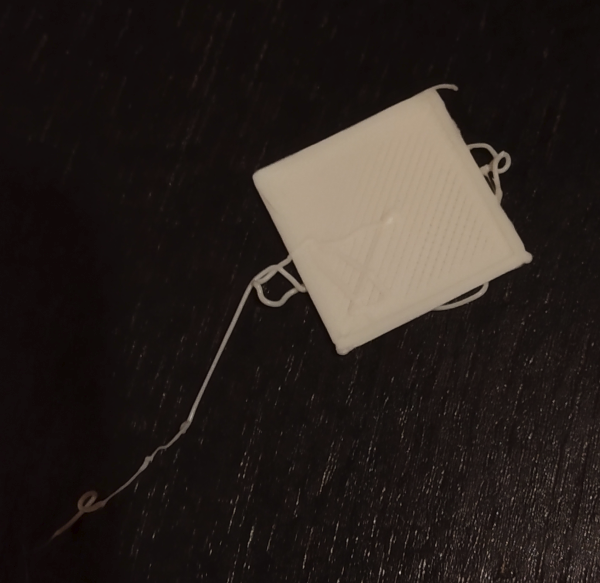
Anyway, having re-leveled the bed, I've now got working bed adhesion and something resembling a proper (start of a) print:
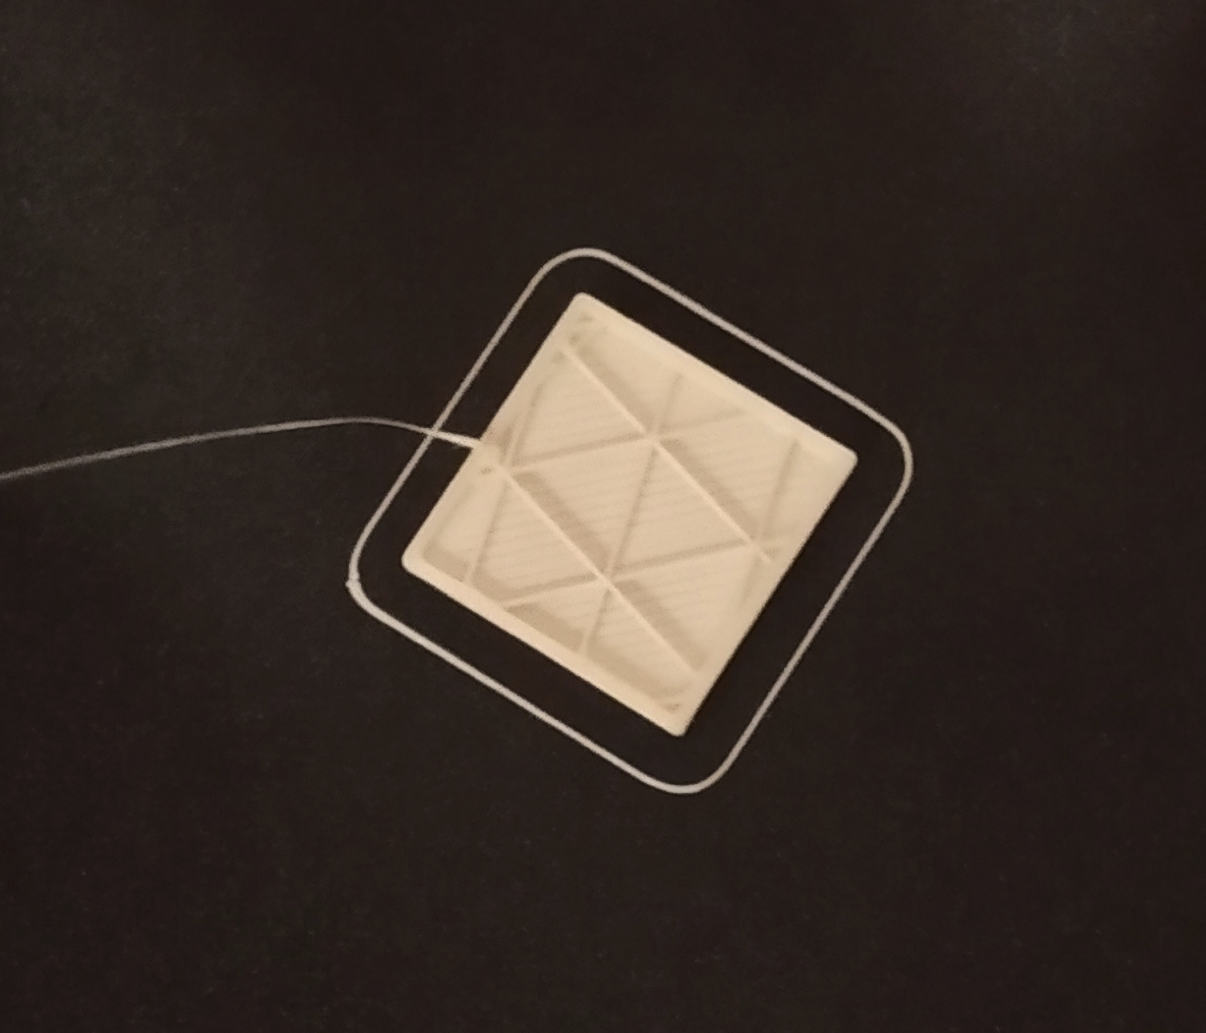
I stopped it after a couple in-fill layers, since I didn't feel like holding the plastic tube for another half hour while the whole thing printed.
Here's how it looks after peeling it off the print surface:
Top: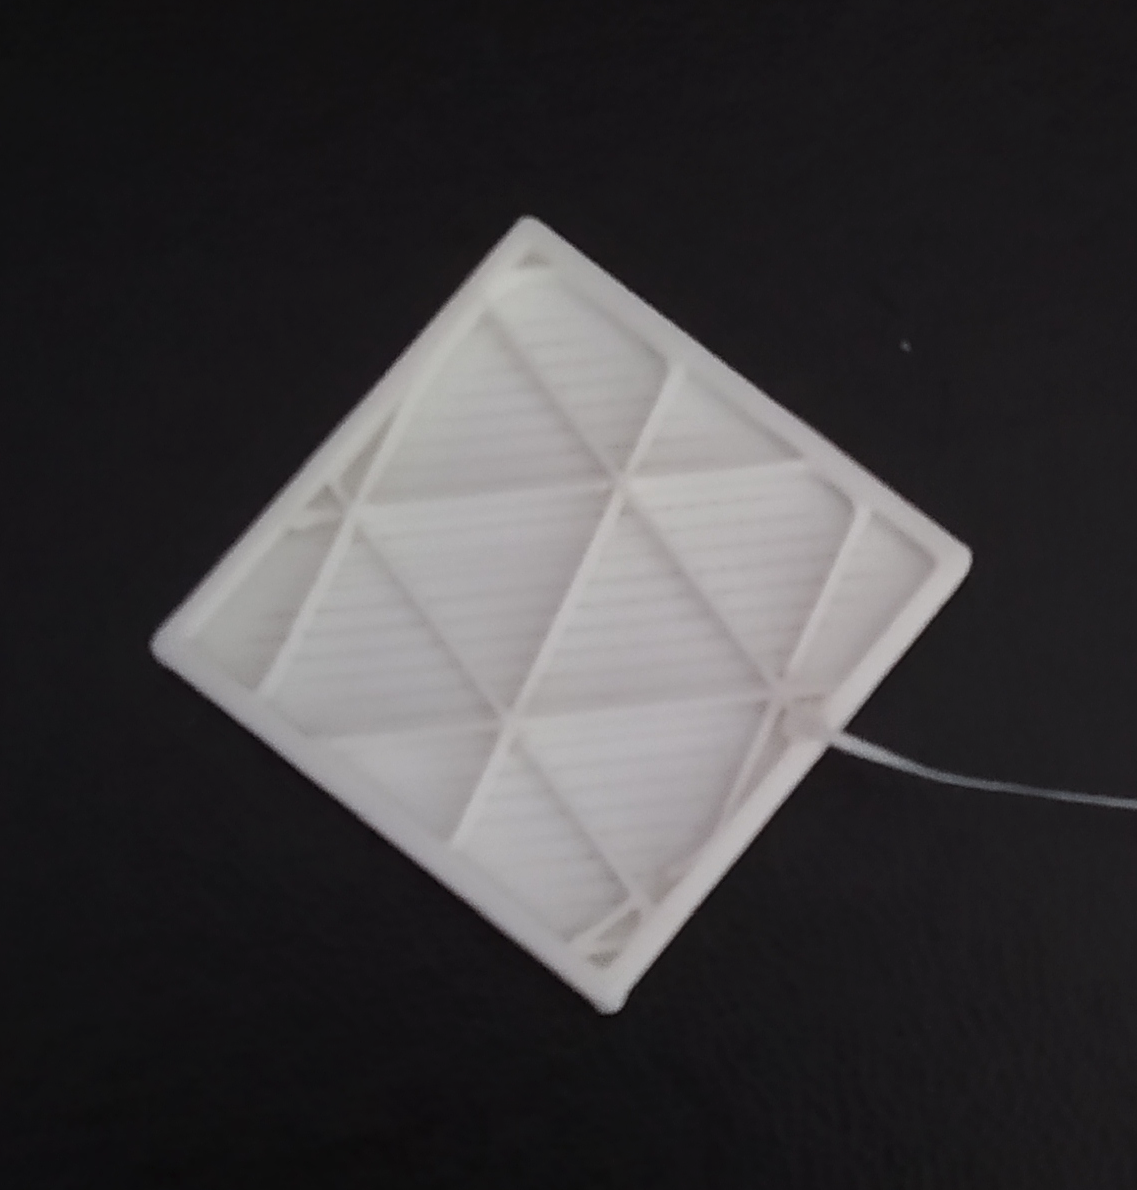
Bottom:
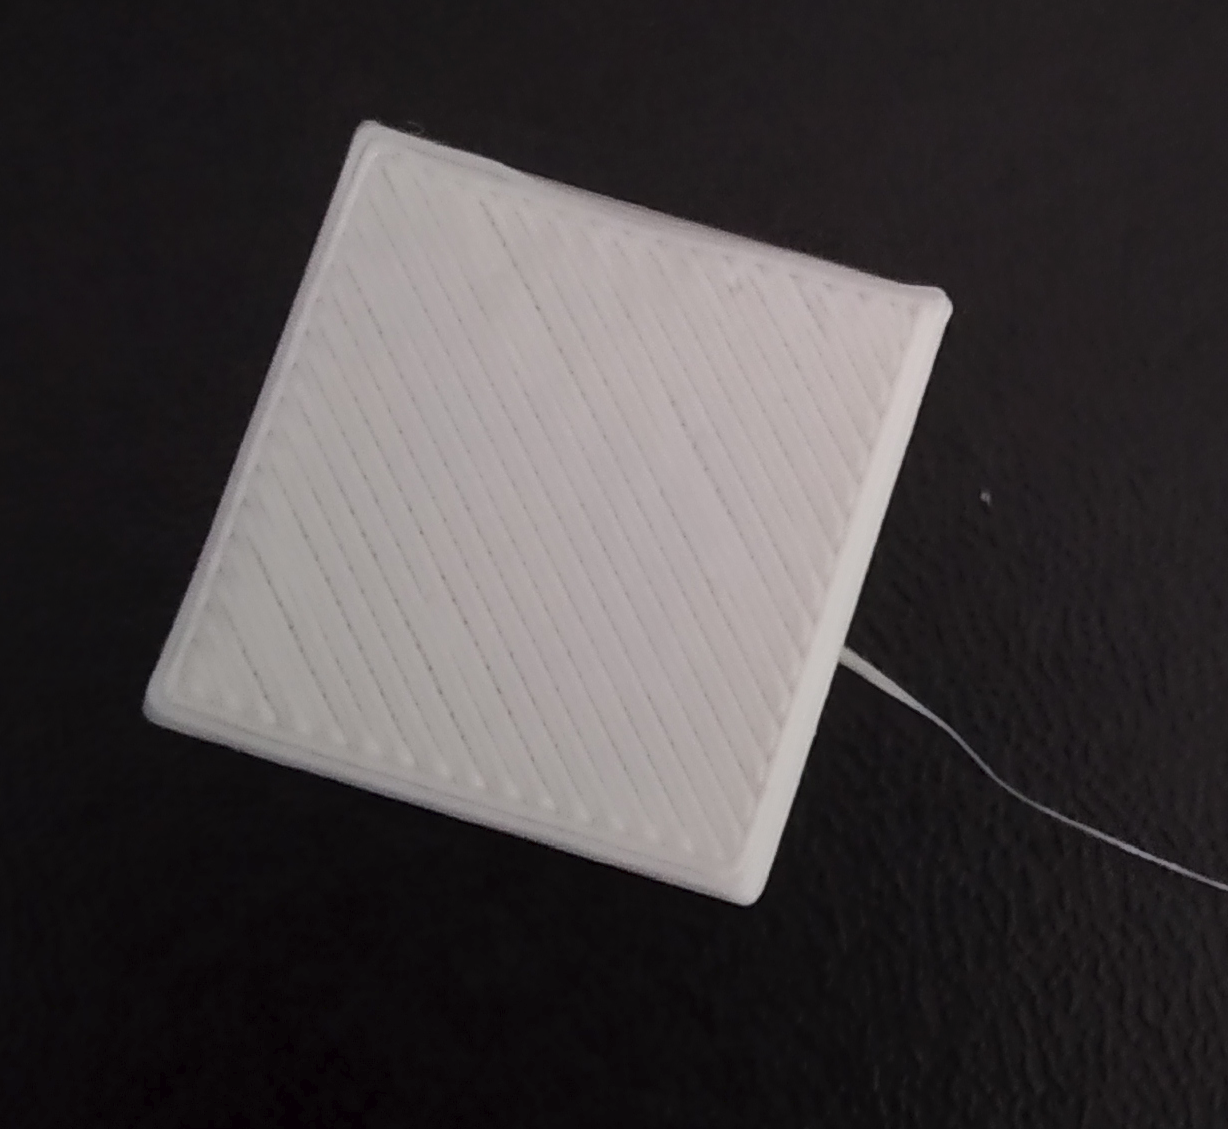
It's not quite perfect, but good enough for now.And here's my jerry rig setup that kinda-sorta works but I still have to hold it with my hand:

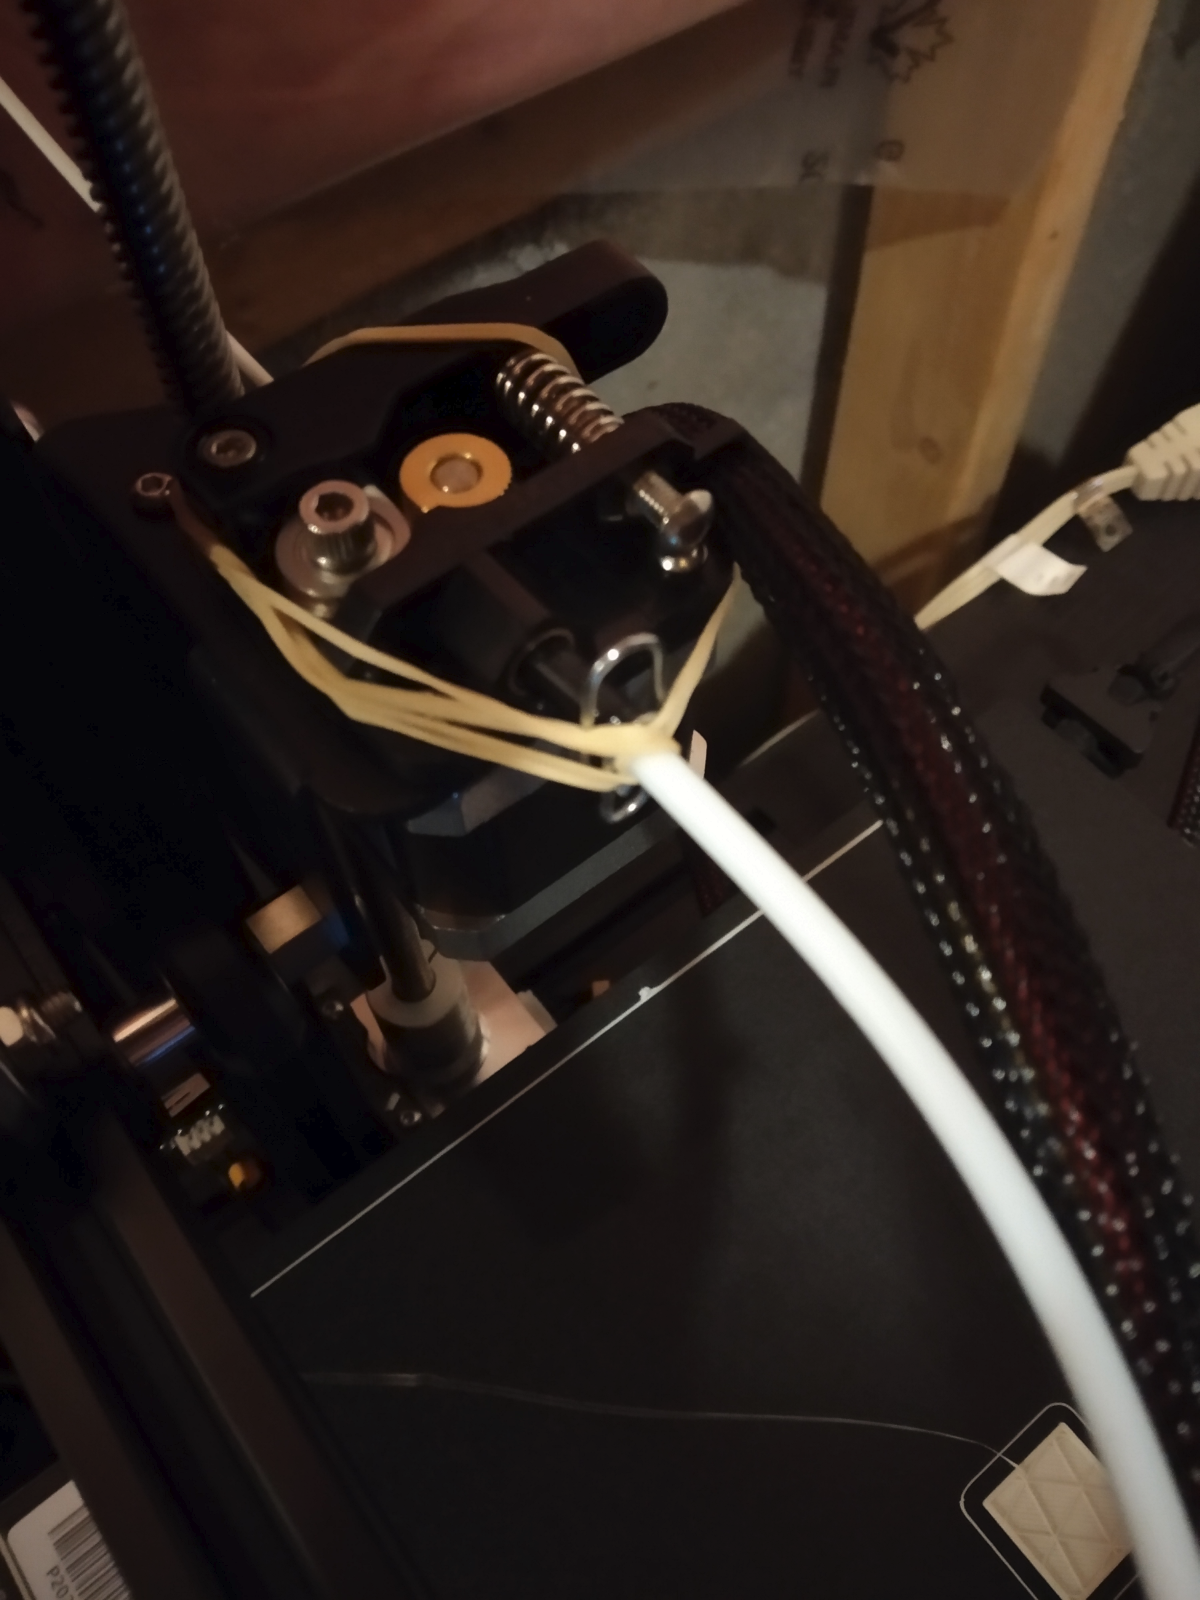
I've got some electrical tape wrapped around the end of the tube, acting as a collar for the paperclip, and a couple rubber bands holding it on the extruder assembly. The rubber bands aren't quite strong enough to keep the tube from being pushed while it's extruding plastic, so it's not ready to set-and-forget, but now I can theoretically print a thing to go in there, holding the tube steady while it prints.
-
@hungrier said in Today in Blakeyrat is always several years behind in every tech trend news...:
electrical tape
rubber bands
Substitute duct tape and Bondo and you got yourself a custom part.
-
@hungrier said in Today in Blakeyrat is always several years behind in every tech trend news...:
but I'll need to readjust the bed level up to that position with a thinner piece of paper.
Sorry, meant leveling rather than calibration above. The printer that I have auto-levels before each print, the only thing I have to tell it to do manually is a calibration (and that only if something changes).
-
@hungrier said in Today in Blakeyrat is always several years behind in every tech trend news...:
In the meantime, I assembled the thing, and everything I can test seems to be working. The Z motion is excruciatingly slow, and I saw in the menus that the max speed is set way lower than the other axes.
It will be. Your X and Y axis can move up to 220mm on each layer. Your Z axis only moves 0.4mm per layer and only once per layer until you add automatic bed leveling. The low speed helps it home more accurately via the microswitch.
It isn't that big of a deal. Before you home or start a print just manually lower the gantry close to the bed. Also, once you decide to upgrade the main board you can up the homing feed rates quite a bit if you want.
-
@hungrier said in Today in Blakeyrat is always several years behind in every tech trend news...:
until I get the connector. Maybe I'll think of a way to jerry rig it while I'm waiting for the part to come in.
I doubt that you can. There is quite a bit of force there.
It is just a pneumatic connector. If you have a Grainger nearby they would probably have it. I would also suggest getting an assortment of those connectors off Amazon as spare parts. They can and do fail and are a semi-wear part.
-
@hungrier said in Today in Blakeyrat is always several years behind in every tech trend news...:
First jerry rig idea lasted through about 10 seconds of printing
Yep.
-
@cvi said in Today in Blakeyrat is always several years behind in every tech trend news...:
Has anybody here used Cura's "Gradual Infill" mode? I ended up playing around with it a bit, to reduce the printing time of a larger print that doesn't need to be particularly stable mechanically. But it always ends up generating floating sections of infill that it then tries to build on.
Specifically, this happens when it switches from one level of infill resolution to a higher one. So, with the basic grid infill, it occasionally tries to start printing a higher level in the middle of a grid cell of the lower level. I tried a bunch of different infill patterns, but saw the same thing in all. Kinda makes the feature a bit useless. But maybe I'm missing something.
(While writing this post, I think I might have an idea on how to solve this in a different way -- technically, the model doesn't need to be closed at the bottom, so I can open it up and hopefully use just the standard removable infill. But still.)
Look up "Cura multiple processes" on YouTube. You can adjust your print settings based on layers. PrusaSlicer also has a "variable layer height" option that works pretty well but isn't perfectly suited for Ender type printers with stock boards. The A4988 boards with the Ender motion controls really need to run at layer heights that are evenly divisible by 0.04mm, for reasons I don't feel like getting in to right now typing on mobile.
-
@cvi said in Today in Blakeyrat is always several years behind in every tech trend news...:
@hungrier I ended up getting rid of the special magical build plate layer that was supposed to help with adhesion. Now I just print directly on the glass, with a thin layer of glue from one of those glue sticks to make the prints adhere. The glue happens to be water soluble too, which makes it easy to wash of remains after a few prints.
The build plate worked initially for me, but ended up looking quite rough after a few prints and the adhesion wasn't great at that point either (for the first few prints, things really stuck to the plate).
The BuildTak that comes with most printers is exactly what you said. Works well for a bit but wears out quickly. I prefer either glass for ABS (because it pops loose on its own) or powder coated or PEI coated spring steel. If you don't crash your nozzle they will last for hundreds of prints and models are very easy to remove.
-
@hungrier said in Today in Blakeyrat is always several years behind in every tech trend news...:
@cvi The downside is that it also means I probably can't print ABS or anything that needs a bed temperature above however much, but I can worry about that later.
BIQU makes spring steel build surfaces like mentioned above that I have run at 110C in enclosures with no loss of magnetism. They include their own magnetic sheets to use.
-
@Polygeekery said in Today in Blakeyrat is always several years behind in every tech trend news...:
Your X axis
ITYM Z axis.
-
@Gribnit said in Today in Blakeyrat is always several years behind in every tech trend news...:
@Polygeekery said in Today in Blakeyrat is always several years behind in every tech trend news...:
Your X axis
ITYM Z axis.
ITYC
-
@cvi said in Today in Blakeyrat is always several years behind in every tech trend news...:
Underside looks strange, almost like it isn't quite reaching the build plate. Better Z-calibration? (You're doing the calibration by hand?)
It isn't the first layer, and is the last layer before infill starts. So unless he was off by a mile on Z leveling (I dislike that term, what we are actually doing is tramming the gantry) it is more likely to be underextrusion.
-
@Polygeekery said in Today in Blakeyrat is always several years behind in every tech trend news...:
It is just a pneumatic connector. If you have a Grainger nearby they would probably have it. I would also suggest getting an assortment of those connectors off Amazon as spare parts. They can and do fail and are a semi-wear part.
With the current lockdown/not-a-lockdown/whatever it is, non-essential stores can only do curbside pickup, so it's more difficult than it should be to get stuff like that locally. As for Amazon, I probably will end up buying some spares, but for now I'll wait for the seller to ship it to me and/or give me an estimate of when it would come in.
I've also seen various upgrades that are supposed to reduce wear and improve the reliability of the connectors and tube, but all the ones I've seen require a) 3D printing, which I can now kinda-sorta manage, and b) the actual connector in place.
-
@hungrier said in Today in Blakeyrat is always several years behind in every tech trend news...:
I figure the Z would be good as well right out of the box
Other than tramming the bed and getting your first layer height set well, there is no calibration that can be done or needs to be done on your Z axis. It is a leadscrew. It will be inherently accurate within the 0.04mm step resolution.
-
@MrL said in Today in Blakeyrat is always several years behind in every tech trend news...:
Do yourself a favor and invest in BLTouch. Bed leveling by hand is a PITA and only becomes more irritating as time goes by.
Yes, they are a convenience, but you still have to tram your bed. ABL has a fadeout. Like on my printers I set it to fadeout the bed leveling corrections in 10mm. So after 10mm height there are no more mesh corrections being made.
You still have to accurately level your bed and preferably do so in a way that prevents it from losing its tramming. I fixed that issue by getting some solid spacers from Home Depot and then very accurately leveling my bed by adjusting their overall length so that when the bed bolts are torqued down the bed is as trammed/level as I can get it.
-
@Polygeekery said in Today in Blakeyrat is always several years behind in every tech trend news...:
@cvi said in Today in Blakeyrat is always several years behind in every tech trend news...:
Underside looks strange, almost like it isn't quite reaching the build plate. Better Z-calibration? (You're doing the calibration by hand?)
It isn't the first layer, and is the last layer before infill starts. So unless he was off by a mile on Z leveling (I dislike that term, what we are actually doing is tramming the gantry) it is more likely to be underextrusion.
It may have been some combination of factors including my tape-and-rubber extrusion solution, but leveling did fix the issue.
-
@Polygeekery you just made up this word tram right now, admit it.
-
 A New System Uses Sawdust to Print Wooden Objects

A new printing system called Forust is using scrap wood to 3D print wooden objects that are as structurally sound as regular carved wood. Created by
 Amazon.com