Today in Blakeyrat is always several years behind in every tech trend news...
-
@Benjamin-Hall said in Today in Blakeyrat is always several years behind in every tech trend news...:
18µm XY resolution
I'm trying to compare that to mine, but Anycubic has both discontinued both of my printers and stopped publishing XY or Z resolution for any of their current models. I'm happy with my printers, but I'm no longer happy with the manufacturer.
-
@Benjamin-Hall Going to print minis for your games? I see this trend picking up. Now, if only there was a machine that would do the painting...
-
@Benjamin-Hall Looks fun. (I'm tempted by one of those, but people keep advising against using them in an apartment without dedicated ventilated space ... and having it in a some sort of protective closure (growth tent?) or similar on the balcony sounds like a bit too much of a PITA. Not that I really use the balcony for anything else...)
-
@Applied-Mediocrity said in Today in Blakeyrat is always several years behind in every tech trend news...:
@Benjamin-Hall Going to print minis for your games? I see this trend picking up. Now, if only there was a machine that would do the painting...
Just hire that out on fiverr. Lotsa starving artists thanks to the AI revolution

-
@Applied-Mediocrity said in Today in Blakeyrat is always several years behind in every tech trend news...:
@Benjamin-Hall Going to print minis for your games? I see this trend picking up. Now, if only there was a machine that would do the painting...
Painting is the part I like. But painting requires minis...
-
@Benjamin-Hall said in Today in Blakeyrat is always several years behind in every tech trend news...:
@Applied-Mediocrity said in Today in Blakeyrat is always several years behind in every tech trend news...:
@Benjamin-Hall Going to print minis for your games? I see this trend picking up. Now, if only there was a machine that would do the painting...
Painting is the part I like. But painting requires minis...
A sacrifice you will be only too willing to make?
-
This post is deleted!
-
@Benjamin-Hall said in Today in Blakeyrat is always several years behind in every tech trend news...:
painting requires minis

-
@HardwareGeek said in Today in Blakeyrat is always several years behind in every tech trend news...:
@Benjamin-Hall said in Today in Blakeyrat is always several years behind in every tech trend news...:
painting requires minis
My dad made a convoluted pun along those lines. Something like "you need to involve a barrel maker in your games. Then you'll have an excuse to get a mini cooper."
-
-
@cvi said in Today in Blakeyrat is always several years behind in every tech trend news...:
dedicated ventilated space
It depends on the resin you use, but even the low-odor resins aren't pleasant. And on the printer; there are some with built-in activated charcoal filters. I don't know how effective they are; neither of mine have them, so I have no experience. An open window with a fan pulling the fumes out may be enough, at least with low-odor resins and a filter. You'd also have to be meticulous about cleaning up spills thoroughly and disposing of gloves, paper towels, and anything else that might have residue promptly. Still, you'd want to have it in something like a spare bedroom, not a room you inhabit constantly.
So yeah, pretty much a dedicated hobby/craft room with good ventilation, although it doesn't need to be dedicated exclusively to printing.
Edit: I a word.
-
@HardwareGeek said in Today in Blakeyrat is always several years behind in every tech trend news...:
I've contacted customer support about repair/replacement. Who knows how long that will take?
About 5 days, plus transit time, apparently. The necessary part is currently out of stock.
-
@HardwareGeek said in Today in Blakeyrat is always several years behind in every tech trend news...:
yeah, pretty much a dedicated hobby/craft room with good ventilation, although it doesn't need to be dedicated exclusively to printing.
I'm planning to put mine in my office, under the window, with the window open and door closed if possible when printing. And doing prints when I'm not working in that office.
-
@Benjamin-Hall said in Today in Blakeyrat is always several years behind in every tech trend news...:
@Applied-Mediocrity said in Today in Blakeyrat is always several years behind in every tech trend news...:
@Benjamin-Hall Going to print minis for your games? I see this trend picking up. Now, if only there was a machine that would do the painting...
Painting is the part I like. But painting requires minis...
Great. Time consuming, though. And somewhat limiting sessions to be "on rails", so you get to use them, unless you've already got loads of them.
-
@Applied-Mediocrity said in Today in Blakeyrat is always several years behind in every tech trend news...:
@Benjamin-Hall said in Today in Blakeyrat is always several years behind in every tech trend news...:
@Applied-Mediocrity said in Today in Blakeyrat is always several years behind in every tech trend news...:
@Benjamin-Hall Going to print minis for your games? I see this trend picking up. Now, if only there was a machine that would do the painting...
Painting is the part I like. But painting requires minis...
Great. Time consuming, though. And somewhat limiting sessions to be "on rails", so you get to use them, unless you've already got loads of them.
Use them? Nah, I just like painting them. For sessions I use colored glass tokens 90% of the time, leaving the real minis for set pieces such as bosses.
And I do already have a huge collection of various things. I'm kinda most interested in printing terrain and clutter to spice up battlefields as well as some hard to source character minis for various groups and/or gifts.
-
@HardwareGeek said in Today in Blakeyrat is always several years behind in every tech trend news...:
The necessary part is currently out of stock.
Because it is so commonly damaged during shipment, no doubt.
-
@Tsaukpaetra It doesn't have a lot of padding around it.
-
Status: Speaking of, I am doing the silly and pre-ordered the Positron kit.

Apparently it still needs some printed parts (some 350 grams of stuff by some measures?) so we'll see what my current printer can do.

-
Today I went to my local bin store and got some pretty good deals:
- 2 rolls of PolyTerra PLA, black and white - about half what generic filament costs at retail, and slightly better than half for PolyTerra
- a generic 3D pen - about 40% of the cheapest online price
- also a Victrola Journey record player/bluetooth speaker, but that has nothing to do with 3D printing
The pen had some filament stuck in it, and wouldn't move it either forward or back, so I took it apart and found that the bowden tube inside was clogged. I replaced it with a short length of Capricorn tubing and now it works A-OK
-
Update: The 3D pen is very effective at welding 3D printed items together, albeit with a lot of excess material on the joint
-
Even so, Dillo remains very limited. It doesn't support frames, embedded media playback, and, biggest of all, JavaScript

-
@DogsB it’s open source, though I assume donations gratefully accepted.
-
@DogsB said in Today in Blakeyrat is always several years behind in every tech trend news...:
Dillo
IRTA Dildo.
-
Printer Status: Test Print 6%. Doesn't actually smell very bad at all (using ABS-like resin). The active filter must do a pretty good job.
-
@Benjamin-Hall first attempt stuck to the vat, not the plate. Second attempt after re-leveling completed... But is now very firmly adhered to the build plate. Sigh.
-
@Benjamin-Hall I know those feels.
-
@HardwareGeek said in Today in Blakeyrat is always several years behind in every tech trend news...:
@Benjamin-Hall I know those feels.
I ended up freezing the build plate overnight (sealed in an air tight plastic bag) and it popped off in the morning.
-
@Benjamin-Hall Good idea. I never thought of that.
-
@HardwareGeek said in Today in Blakeyrat is always several years behind in every tech trend news...:
@Benjamin-Hall Good idea. I never thought of that.
I saw it on Reddit, actually. I was prepared to break out the big guns (a sharp scraper), but didn't want to damage the build plate.
ON a related note, I'm going to switch to water-soluble resin for the next prints. Because the regular stuff is so annoying to deal with.
-
@Benjamin-Hall said in Today in Blakeyrat is always several years behind in every tech trend news...:
sharp scraper), but didn't want to damage the build plate.
BT;DT. That's one of the reasons I'm annoyed with AnyCubic being so quick to discontinue printer models and the spare parts for them. I'm not so concerned about damaging the build plate of my older printer; it's just a brushed finish that I can restore easily. (Unfortunately, the printer itself was damaged by a power problem, and no replacement board is available.) The build plate of the newer printer has an etched texture that I can't recreate. (I think it's been discontinued, too, already. Their new ones really are improved, but damnit, stop discontinuing stuff I just bought.)
I'm going to switch to water-soluble resin for the next prints. Because the regular stuff is so annoying to deal with.
I've mostly used plant-based resin, which (allegedly) smells less bad than ordinary resin. It cleans up with alcohol, like most other resins, but spills never seem to stop being sticky. INB4 QooC.
-
@HardwareGeek said in Today in Blakeyrat is always several years behind in every tech trend news...:
INB4 QooC.
Hey, you!

-
@HardwareGeek said in Today in Blakeyrat is always several years behind in every tech trend news...:
I've mostly used plant-based resin, which (allegedly) smells less bad than ordinary resin.
Introducing the "plant-based" label was one of the best marketing ideas of the last decade. Imagine the acceptance if they still called it "vegan"

-
Today I picked up an SKR 2 board for cheap from the bin store. I already have an SKR Mini E3 v3 that I'm using in my Ender 3, but maybe this will be the thing that gets me going on building a Voron or something.
-
I don't know if this could be useful for someone here:
 Notion – The all-in-one workspace for your notes, tasks, wikis, and databases.

A new tool that blends your everyday work apps into one. It's the all-in-one workspace for you and your team
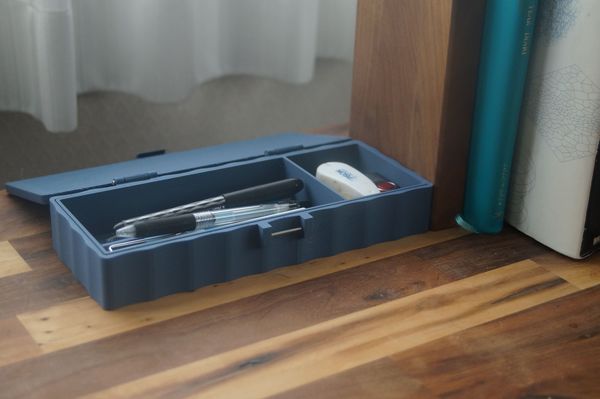
Bento3D is a web tool that allows you to create 3D printable dividers and toolboxes with millimeter precision.


-
@Zecc
Instant OCD boners ahead
-
I've now crossed the threshold to becoming One Of Those Multiple 3D Printer Guys with the purchase of a used Ender 5 Pro. Looking forward to setting it up and maybe putting the SKR2 board mentioned above to some use
-
SKR2 status: After a bit of worrying about whether it actually worked or not, I've verified that it can take Marlin firmware and work perfectly well (at least as far as I've tested) and drive stepper motors using TMC2209 drivers. Now to do the rest of it...
-
Update: It looks like the SKR2 board just barely won't fit in the Ender 5 case. Or rather, without at least some modification, the board itself fits but not in a way that would allow access to the USB port or card slot (or the USBA port, but I don't expect to ever use it). I could try getting a right angle USB adapter and hoping that it'll just barely fit, and an SD card extender almost certainly won't fit, or cut parts out of the case and those bits will just barely clear the 2020 extrusion, but I'd much rather make a case for the board that'll sit right below the control panel. The only other thing I would need to do in that case is to extend the 24V power wires to reach that. I suppose I could also download and print Teaching Tech's full case replacement, but for now I don't want to do that.
-
@hungrier said in Today in Blakeyrat is always several years behind in every tech trend news...:
the 2020 extrusion
Maybe you need some 2024 extrusion.
-
@HardwareGeek I knew I was doing something wrong!
-
@hungrier You know what they say, hindsight is 20/20.
-
@hungrier said in Today in Blakeyrat is always several years behind in every tech trend news...:
Update: It looks like the SKR2 board just barely won't fit in the Ender 5 case.
Make a new one.
-
I finally got all the damaged parts of my CNC router replaced (a couple of weeks, maybe more, ago) and the necessary CAD/CAM software installed (just yesterday). (Carveco Maker on the desktop for designing stuff and generating tool paths. UGS Platform on the laptop to drive the router; it also has an off-line controller than can read the gcode from a USB stick.)
Made first chips last night (actually the wee hours of this morning; I went to bed at 03:00). It was not an unqualified success.
I was doodling on a scrap of aluminum from another project. Face the top surface. Engrave some lettering. Cut a profile around the perimeter, almost but not quite detaching it from the ends where it's clamped to the table.
Set the work zero coordinates. X=0, Y=0: Center of the piece of aluminum. Not exact, but close enough for this test. Z=0. Top surface of the aluminum.
First tool path zig-zags across the top, a paper-thin cut to flatten the surface and remove the mill finish and give it a nice machined finish. At least that was the plan.
Confusion over direction of the Z axis.
Z=0 is the top surface of the material. Use the Z-probe to set the Z=0 height. Ok.
Z=11 mm is its "safe" height to do fast moves; it (in theory) won't hit any clamps or other obstructions. "Outline" the tool path (UGS feature: Move the tool around the perimeter of the path in X and Y, at the current Z height above the surface (no Z moves), to visually make sure it will clear obstacles). It's ok; it won't hit the clamps, which are the only obstacles on this piece of flat aluminum.
Cool. Start running the tool path. It always starts by moving to it's "safe" position, X=0, Y=0, Z=11. From there, it starts the spindle, moves to the starting X,Y, and moves to the initial cutting depth. It's already at (or pretty close to) X=0, Y=0, so the first thing it tries to do is move to Z=11.
Remember what I wrote about the Z axis direction? Yeah, it tried to jam the tool 11 mm below the surface of the aluminum. (The aluminum was only 1/4" (6.35-ish mm) thick.) Not even trying to cut that deep; just push it into the metal without cutting. Awful noise from the Z stepper motor. Then it starts the spindle and cutting a deep gouge diagonally across the piece on its way to the starting X,Y, before the controller figured out something was wrong.
This was my fault. The default UGS setup was correct. UGS, the off-line controller, and the programmed tool path all agreed on which direction +Z was (+Z
 ; -Z
; -Z  ), but my brain thought +Z was cutting into the material and -Z was away from the material, so I told UGS to reverse the directions.
Somehow, nothing broke. I suspect this was due to probably a combination of the Z stepper losing steps (the controller sends the motor a pulse, but it doesn't have enough torque to overcome the opposing force, so it doesn't actually move) and/or the spindle motor slipping in its bracket (the bracket clamps around the cylindrical spindle motor, but it's basically held in place by friction; there's no flange or anything to provide a positive engagement, so enough force along the spindle (Z) axis will overcome the friction and push the motor through the bracket).
Reconfigure UGS. Re-zero the Z axis. Because the spindle motor slipped in its bracket (but I hadn't figured that out, yet), the Z axis doesn't have enough travel in the -Z direction to reach its logical 0 position. Re-clamp the workpiece to the table, but raised on parallels, so it's sitting higher above the table. Re-zero the Z axis again. Run the outline again. Everything looks good.
Timidly run the tool path again. It moves to Z=11. It moves the the starting X,Y. It lowers to the cutting depth and starts zig-zagging across the surface. Looks good.
Except that it's barely touching the surface, only hitting a few high spots. The cutting depth is something I can fix easily in the gcode editor. Changed the depth from .05 to .075. Better, but still not enough. Changed to .1.
 Sorta.
The surface finish is not a good as I was hoping for. My fault. I used too big a stepover. That is, I moved the cutting bit the full diameter of the bit between passes, no overlap, so the places where each zig meets the previous zag isn't perfectly smooth. The stepover isn't something I can fix in the text editor, at least not easily, and
 to go back to Carveco at 01:00, or whatever time it was. Also, I think the spindle may not be perfectly perpendicular to the table, because the cutting is a little uneven. This is fixable; the alignment was part of the initial machine setup, and I can redo that without difficulty, except that my machinist square has gone missing, of course.
Anyway, I now have a flat bar of aluminum with a slightly thinner section milled across the middle. (Of course, I can't machine the ends where it's clamped.) And a gouge across it, but this is just a test; I can ignore that and continue the test.
Next step, engrave some lettering. The CAD part of that is a pain, converting the font lettering to vectors and cleaning up the vectors so the software can generate tool paths. You can use any TrueType or OpenType font installed on your computer, but some are easier than others. If the vectors form loops, the software throws an error and refuses to even try to generate paths. If the stroke of a letter is narrower than the point of the bit, the software will skip that part of the letter. Simple block fonts like Arial may not need any cleanup, but fancy decorative fonts may be a royal PITA, and I picked a couple of very fancy script fonts for the test. And using a bold modifier (because your fancy font doesn't have a bold variant) to fix strokes that are too narrow is pretty much guaranteed to create loops, but at least they're fairly easy, if tedious, to fix.
Once the CAD was done and the tool paths generated, though, the engraving went off without a hitch. Of course, it uses a different bit than the face milling, and that means re-zeroing the Z axis, because the tools are different lengths, but you have to do that any time you change bits. The engraving is slow, because Carveco generated inefficient tool paths. Lots of unnecessary lifting (always to the "safe" 11 mm, even when .5 mm would have been more than sufficient) between segments
that could have been a single segment. Lots of engraving single dots, for some reason, then later going back and connecting them to the rest of the letter. Maybe not a problem for simpler fonts.
The engraving left a lot of burr along the grooves, but that can be cleaned up with another very light facing pass, like step 1, or a little very fine sandpaper.
Then to profile cut around the test piece. Desired profile was to be a rectangle with concave rounded corners, atop a rectangle with convex rounded corners, and finally a simple rectangle that almost but not quite separates it from the ends.

The rounded rectangles are supposed to each be 2 mm high (i.e., 2 mm depth of cut), with the plain rectangle cutting deep enough to leave .1 mm of residue. Each should consist of four 0.5 mm passes. However, that's not what happened. The tool immediately plunged to its full cutting depth and then tried to move horizontally much too fast for that heavy a cut. It was cutting faster than it could clear the chips from such a deep, narrow groove, generating a lot heat, and eventually the aluminum chips basically welded themselves to the bit, preventing any further cutting.
And at some point, the router decided to change its "home" position. It was X=0, Y=0, Z=max in the the machine's absolute coordinate system. Lift the tool as high as it will go, then move left and forward until it hits the limit switches. This is how it finds it's origin when it's first powered on or any other time it's actual physical location is uncertain. However, at some point last night, it decided "home" was (0,0,0) instead of (0,0,max). So, instead of lifting the tool safely above anything it might hit when homing to X=0, Y=0, it instead attempts to ram the tool through anything unlucky enough to be underneath it, including its own table. At 03:00, after a few resets and power cycles trying to fix this, I decided it was (well past) time for bed.
Oh, and did I mention, it's summer in Texas? It was 90°F and 90% humidity in my garage the whole time I was doing this.
-
This is what it was supposed to look like (minus a monogram that would be too self-doxxing). The fancy letters are "AaB" in a very ornate font, rotated counterclockwise 90°.

-
And this is what it actually looks like.

In addition to the gouge, note the mangling of the outer profile, especially at the upper left. That's where the aluminum welded itself to the cutter during the second attempt to cut the concave rectangle profile, after (I thought) fixing the cutting depth and feed rate.
-
Status: FUCK!
Accidentally destroyed a belt retainer block on my never-been-actually-used new 3D printer while test-executing the fold-down procedure.

Turns out, you really should release the tensioner lock before moving the column...
Whelp, I guess we'll see just how capable my current one is in producing a rather tight-tolerance item...
-
@Tsaukpaetra said in Today in Blakeyrat is always several years behind in every tech trend news...:
how capable my current one is in producing a rather tight-tolerance item
belt retainer block
Does it need to be able to bear the tension of the tightened belt? If so you may be better off getting a new one than trying to replicate it with a 3D printed part
-
@hungrier said in Today in Blakeyrat is always several years behind in every tech trend news...:
@Tsaukpaetra said in Today in Blakeyrat is always several years behind in every tech trend news...:
how capable my current one is in producing a rather tight-tolerance item
belt retainer block
Does it need to be able to bear the tension of the tightened belt? If so you may be better off getting a new one than trying to replicate it with a 3D printed part
It was intended to be a printed part. That's why it snapped after all, couldn't handle the stress of the force-multiplying effect of the column-turned-lever.
Edit: This is the model you're intended to print:
 Positron/Printed Parts/Bed/Z_Belt_Retainer_Block - 1x - Primary - V1.0.stl at main · Positron3D/Positron
The Positron Printer. Contribute to Positron3D/Positron development by creating an account on GitHub.

 Dillo browser revived with version 3.1